Resources, Personal

My Voice Over Equipment for 2023

March 2023 update:

My laptop is outside my booth now and I have two monitors inside my booth!

  • 4’ x 4’ vocal booth from Vocalboothtogo.com

  • MSI Laptop on a TV Tray Table

  • Mobile Standing Desk

  • Lemorele 11 in 1 USB C Laptop Docking Station Dual Monitor Hub for:

    • USB C (Connects to Laptop)

    • 2 HDMI ports (for 2 monitors)

    • USB 3.0/2.0 slots (for SSL2, Webcam, and desk fan)

    • Ethernet slot (for hardwire)

    • SD card slot, etc…

  • Two monitors - Sceptre 20” 1600 x 900 75Hz LED Monitor

  • HUANUO Dual Monitor Stand (Vertical Layout)

  • Bluetooth Keyboard and Mouse

  • Stool


February 2023

It is now nearing the end of February and since the new year I’ve experienced lots of changes. Because I moved, I no longer have a walk-in closet with foam padded walls and clothes to help dampen sound. I invested in a 4’ x 4’ Vocal Booth to Go, which is basically a metal frame surrounded by acoustic blankets. Currently, I’m trying to adhere some of my old (pink) foam to the inside since I still have them.

Inside

  • MSI Gaming Laptop

    • Note: I kill the fans when I record. Most people will put their computer/laptops outside the booth and use a wireless keyboard/mouse + monitor to control it from the inside. 

  • Second Monitor

  • The desk is just a simple standing desk (pink of course) with a (pink) stool. I’m always standing when I record. I’ll sit for editing, of course.

  • I use a TLM103 and a SSL2 Audio Interface on a mic arm clipped to the desk.

    • I only have a TLM103 because I was made to. Otherwise my Rode NT1 would have been fine. I now use my Rode for streaming.

  • The booth came with a light

  • I also have a little, cheap desk fan (pink) since it can get hot in there. (For use when not recording.)

  • Some vocal remedies to be stored in a cute pineapple shaped pouch

    • Nin Jiom Pei Pa Koa hard candies for throat soothing

    • Alkalol Nasal Spray to clean sinuses

    • Mouth Kote Dry Mouth Spray to help moisturize the mouth (It’s sour to help you produce saliva. If you feel like your mouth is clicking a lo due to liquids, it may indicate that you’re dehydrated)

    • Oovo Sing Ring for straw phonation

  • Other junk

    • Lightning from FF13 as my booth buddy (Yes! She’s also pink!)

    • Mr. Mew from TWEWY as my other booth buddy. (He holds my headphones)

    • Decor such as a geometric light that has no batteries in it currently and a fake plant in a pink pot.

And that’s all I currently have! I’ll continue to document as I uncover things to improve my set up and of course, if anyone has any recommendations, I’d love to hear it!

I’ll also be making a post about my equipment for streaming, including Vtuber software, and yet another post about my philosophy on spending money on equipment. So please look forward to it!

Resources

10 (+1) Commandments of Being Chronically Online as a Content Creator

  1. Never take posts about your interests or commentary by the community personally: comments on your posts usually speak more about the person commenting than you. Things that come across your feed/dashboard/FYP aren't about you

  2. You're not obligated to respond to any engagements that mention you or your work. You're not obligated to comment, you're not obligated to respond, you're not obligated to follow back.

  3. You have the power to walk away from the commentary or communities online or in person that are not healthy for you. Quitting now doesn't mean quitting forever.

  4. Channel rage, anger, hurt, frustration into action: report, block, go for a walk, donate to charity, work on your projects

    4.5 Alternatively, if you're not in a place to criticize (like it's not your job) everything you want to say about someone else, say to yourself in a constructive way, and use that to improve your craft

  5. Perception is a huge part of content creation and online interactions. I don't mean fake it until you make it. I mean if you continuously downplay your achievements when you talk about them to others they'll be unimpressed. Be proud of the work you do, but be grateful for your opportunities

  6. Understand your tools, especially social media - your activities form your space. People will approach you based on what you post, your bio, who you're following, what you like, what you search.

    6.5 Also, keep that in mind when a predatory company approaches you because "they love your content." Be discerning about where you spend your energy when it comes to contracts, sponsors, and serving others’ interests. 

    6.51  Unlearn that your "For You Page" isn't literally for you, and give yourself the freedom to say "this isn't for me"

  7. Learn to identify what's genuine - people, brands, messaging

  8. Don’t feel obligated to impress your friends. If you feel like you have to be impressive amongst your friends, then you're in the wrong group of friends. 

  9. Sometimes your friends' content isn't within reasonable boundaries of your social, emotional, and physical well-being and that's okay. Allow yourself to not be burdened with the obligation of consuming their content. 

  10. Support is unconditional to a certain degree. You should feel free to cancel/make changes to plans without worrying about losing support. But if you’re an awful person, don’t expect people to stay

  11. Don't over explain. You don't owe anyone that. You don't have to tell people why you're canceling or changing things. Or that you want to do XYZ. you don't need to prove yourself in this way. No response = polite decline

Special Thank You to one of my greatest friends, Megan, who helped me write these coherently!

Personal, Resources

"How Do You Get Into Voice Over?"

“How’d you get into [field]” is a typical adult conversation ice breaker. But sometimes it’s asked with actual sincerity and people expect a A to B to C type of answer. But there is never a set path towards any career. I once spoke with the CEO of a huge entertainment company who said she had fallen into the role and if she had a choice, she would have liked to work with horses instead. You never know what’s next for you and you especially won’t know if you don’t try!

Despite all that, I can still offer an idea of where to get started, especially if you have zero clue, or if you want to know what my path was like. Again, this is just what it looked like for me, so it may not work for someone else. But hopefully someone out there can utilize some of these to pave their own way.

My Story

In 8th grade art class we were supposed to draw ourselves in our dream job. I picked voice actor because at the time I had been super into games, anime, and animation (let’s be real, I still am) and hyper fixated on learning the names of the cast, and recognizing their voices in other media. But I never considered it seriously because I was already assumed to pursue being a doctor, lawyer, or dentist (which I didn’t bother trying to do…)

Present day, I was (am?) primarily an event planner. I also “fell into” event planning some time after working a few jobs for the state government. While working on some of the biggest events in North America, I connected with some voice actors. At the tail end of 2019, Kalmenson & Kalmenson offered classes in my area and I took the opportunity. It was a commercial class and I really enjoyed it, followed my classmates to the next level of classes which was Animation, and fell in love with it.

In 2020, the pandemic hit and shut down everything when I was about to take my 2nd Commercial voice acting class. I lost my job due to COVID19, and was lucky to be in a position where I could “go all in on voice acting.” I took online courses and workshops and that eventually lead me to my current job, which lead me to even more workshops and classes. Then, I took a class at a well known studio that lead me to do some side work for them as an event planner on top of my day job which offered me more opportunity to connect with many people in the industry.

Before all that, it was rocky. I got ghosted by a mentor in a mentorship program and I got scammed out of $700 by a known person in the community… to name a few not so great things that happened.

But somehow, I’m still here.

I’m grateful to have booked a few indie projects, a corporate gig, a short animation, and some mobile games in the 2ish years of pursuing voice over. There are a lot of people who do more in much less time. There are a lot of people who do a lot more in much more time.

Though I’ve worked along side some big names and studios on an administrative level and connected with so many experienced actors, I’m still learning as a voice actor myself. So the following may be outdated or simply incorrect. Again, this is just what part of my path looked like in addition to what I’ve observed and learned. Everything should be altered and molded to what works for you.

Here are the warnings upfront that you may not be aware of:

It’s expensive

  • Due to the pandemic, more actors are able to compete in the field from anywhere - not just LA or New York or Texas. Because of this, home studios with competitive equipment and treatment is more important than ever before.

  • Training has also become more accessible because a lot of places pivot to online classes, but that also means many others are taking classes, so you’ll want to continuously take classes, workshops, and do workouts to keep your instrument sharp.

  • Your instrument is your voice, so taking care of it is essential. But you’ll also want to train your ears, body, and mind - you’ll understand this once you get more and more experience.


It isn’t always lucrative

  • National Commercials pay the most. Anime Dubs pay the least. At the time of writing this, it’s typical for commercials to pay something like $10,000 for a national TV commercial (much less if it’s a local commercial) and anime dubs pay 125/hr with a 2 hour minimum.

  • The standard changes for various reasons including if the project is union or non-union, etc. That being said, understand union vs non-union rates.

  • Understand terms like buyout, residuals, in perpetuity

  • Global Voice Acting Academy

  • Indie Rate Guide

It’s acting

  • If you’ve been told that you had a good voice or if you’ve ever said “I can do funny voices,” that’s not how this all works.

  • Understand that you are acting, performing sometimes in front of nobody, sometimes in front of a director and an engineer, sometimes the representative from the client company, sometimes in front of a group of strangers, and sometimes a group of friends.

  • Understand that you will face a lot of rejection , and even when you’re a veteran, you’ll still be faced with rejection.

It’s a business

  • As an actor, you’re your business. You will need to understand the industry, the finances, networking, marketing, etc.

  • You’re a collaborator and a creator, and people will want to work with you if you’re easy to work with.

  • Sometimes projects don’t have time to work with someone new to the job. Be confident but don’t get cocky.

  • Understand taxes, working with spreadsheets, and have the technological skills to learn how to open files a certain way, save files a certain way, record, submit, email, upload, download, etc.

It’s hard work

  • If you want it to be your career, you have to treat it as such.

  • Many actors still have a second or even third job to “pay the bills.”

  • If you treat it like a hobby, it will continue to be such.

It’s fast-paced and slow at the same time

  • Sometimes it’ll be years before you can talk about what you’ve worked on, sometimes you can’t talk about it at all

  • Commercial auditions are often due same day or next day

  • Animation and Game auditions barely give you more time than that

Alright! Now, let’s get to it!

Taking the First Steps:

  • iwanttobeavoiceactor.com is a site set up by Dee Bradley Baker

  • Start understanding the industry: the process for dubbing, development for games, how finances work, etc. There are a lot of people who think they understand how it works, but don’t. Don’t be that person.

  • Start reading out loud, start practicing in your car

  • Get ready to be perceived

Take classes:

I use class and workshop interchangeably. I’ll use course if I mean its a multi-day/week program

  • All classes I’ve listed under my training are classes I enjoyed and recommend.

  • Ensure that the class is from a reputable studio and/or the instructor has the experience and background to instruct

  • Understand your instructor’s background: do they also voice direct? Are they also a casting director? How can these perspectives help you in your journey?

  • Understand what it is that you might want to get from the class. Is it just practice? Is it networking? Are you trying to develop specific skills or learn certain trends?

  • Understand that all instructors have different opinions and experiences - take from them what works for you, and put aside what doesn’t work

  • Classes can be expensive, so form workout groups with your friends and classmates to regularly workout the acting muscle (the acting muscle is more than just your voice! You’ll need to develop good instincts to inform your performances)

  • If possible, never stop taking classes. Even the most veteran actors are still taking classes. There are resources online and more affordable options available.

  • Take notes, ask questions.

Class Etiquette:

  • Don’t give yourself the excuse before you even try. Don’t start off with saying “I’m not good at this.”

  • Don’t over explain. You don’t need to explain why you’re doing XYZ

  • No need to apologize if you flub up a line, just restart the line

  • California State law, under the Krekorian Act, it’s illegal for casting directors to promise employment or charge for auditions, therefore classes should always be regarded as learning opportunities

Practice:

  • I practice while I stream! I do the voices and read outloud for any games that have lots of dialogue text such as Phoenix Wright, Final Fantasy, or Persona games.

  • https://voiceactingclub.com/ - Founded by actress Kira Buckland, resource, forums, and community, casting call reshares

  • https://www.castingcall.club/ - Classes, casting calls (project quality varies, unpaid and paid projects)

  • https://twitter.com/VACastingRT - Twitter account that will retweet paid casting calls

  • Indie developed projects may not always be of quality

    • Some projects may never finish

  • For games, work on Mid Atlantic accent and British RP accents

  • Work on copying your parents, grandparents, and relatives accents

Big Don’ts:

  • Don’t post scripts from classes or auditions anywhere

  • Don’t post auditioning audio anywhere

  • Don’t use auditioning or copyrighted materials as demo material

  • Don’t break NDAs regardless if you’ve physically signed something or not - always ask permission

  • Don’t beat yourself up in classes, on the job, etc.

Fandubs:

  • I’ve worked in the Anime licensing space as well and am explicitly saying that the license holders of your favorite anime are extremely strict about how their content is distributed and how their branding is used and displayed. Meaning:

    • Fandubs are copyright infringement regardless if you earn money from it or not

    • If you’re going to participate in them, do them in private for practice, don’t publicly post about them, don’t state you’re cast in them

Get coaching:

If you feel like you’re ready for some 1:1 time with an experienced acting coach begin reaching out.

  • Ask your instructors in class if they offer coaching

  • Email/message an instructor POLITELY to see if they offer coaching

  • https://acting.skillshub.life/ - Requires monthly membership, pay coaches per minute rates

  • Make sure you vet your coach

Making a Home Studio:

What you need:

  • XLR Mic (needs phantom power)

  • Interface (the phantom power)

  • XLR cables

  • Mic Stand

  • Shock Mount

  • A computer (quiet like a mac, or placed outside your booth)

  • Recording software such as Audacity (free), Adobe Audition, Reaper

  • A treated space (the booth, closet, foam box, etc)

The Booth:

The Mics (that I’ve used):

In today’s climate, you’ll need to understand how to do some basic engineering and editing of your audio files.

Apply for rosters:

  • Look up localization studios and recording studios to see if they have an application to their roster

  • Ask instructors if they have applications for their personal rosters

Make a website:

  • Put your samples/demo on your website and an email to contact you at the bare minimum.

  • Less is more, but you’ll want to showcase who you are, who you are authentically (if you belong to any communities), and your experience, if any

  • Make it easy - less clicking, less scrolling, easy to read, downloadable reels

  • Try to get a yourname.com or yournamevo.com URL - work on your branding. Googling your name should show your website + social media.

Audition:

  • My auditions come from my agent, management, rosters I’ve submitted to, as well as scouring the internet for some open casting calls.

  • Assume that 1 role will receive 500+ auditions, what can you do to stand out?

  • Attempt the ones out of your wheelhouse for practice, submit what you’re confident in

  • Always audition for your wheelhouse

  • Do not submit any that you cannot authentically represent (ethnicity, sexuality, etc.)

Build a repertoire and experience:

  • Repeat the steps above, it’ll all happen in time

  • Build confidence, tools, knowledge and skills

Create a demo:

  • When you can confidently be directed and redirected and create different character archetypes, then you may be ready for a demo

  • Understand that demo reels are expensive, and therefore should not be made too early as you’ll outgrow them quickly

  • Understand that demo reels are representations of your skill, so only get them done if you feel like you’re ready. You don’t want a bad first impression

  • Self created demo reels are fine if you plan on using it for smaller rosters or indie projects

  • Submit to agencies only quality reels - reels do NOT have to be expensive. Find demo houses that are reputable.

Submit to Agencies:

  • Agencies typically take 10% of work they find for you

  • Agencies do not find all work for you. Once signed, you still have to find work on your own

  • Agents should support you and your career. It’s a mutually beneficial relationship. So they can help mediate or negotiate on your behalf

  • Agencies typically prioritize commercials

  • It’s easier to submit to an agency with a referral from someone else (director, casting director, client referrals before actor referrals)

  • Take agent workshops to see what they’re looking for, and to put yourself in front of them

Take Care Of Yourself:

  • Constant rejection is taxing. Do stuff outside of voice over.

  • Believe in the compliments but don’t get arrogant

  • Take care of your voice

    • Nin Jiom Pei Pa Koa syrup and lozenges for sore throats

    • Malic acid or green apples for mouth clicks

    • Nasal spray for sinuses

    • Vocal misters

    • Straw Phonation exercises

  • Advocate for yourself

  • If you find yourself thinking “This person seems to be getting all the roles” 1. Don’t do that and 2. Imagine all the roles they auditioned for and didn’t get

Auditioning Tips:

These are some tips that I’ve heard time and time again. If these terms are unfamiliar to you, take more classes!

  • Pre-life, Post-life / The moment before, the moment after

  • Understand the tone/genre of what you’re reading for

  • Use physicality, theater of the mind, change your eyeline

  • Breathe

  • Go further, they can always pull you back

  • Angry doesn’t always mean shouting

  • Slow it down

  • Don’t get married to the read, be directable, flexible

  • Have fun

General Tips:

  • Build real connections, don’t do things for clout

  • Do things outside of voice over, have a support circle outside of voice over

  • Understand that you may not be able to go full time early or at all

  • Treat everyone like people

  • Respect NDAs - avoid selfies in the studio, don’t mention or allude to the project online regardless of how excited you are, even if you think you’re being slick

  • Keep record of all your classes and equipment for tax purposes

  • If you’re passing on a project for any reason, see if you can refer someone - lift your friends up

  • Don’t be a jerk

More points to know:

  • Objectively, the person who has the exact same experience, background, sensibilities, etc is the person you were just a moment ago. As long as you strive to be better than that person, you’re doing fine.

  • Don’t be afraid to fail, especially in classes. Failing is learning and it’s better to make a mistake in class than it is on the job

  • Nerves are normal for everyone but not an excuse

  • While many veterans and experienced actors are extremely supportive and kind, your greatest connection will be the peers you meet in class

  • There is no set timeline and there’s no time limit. It’s all different and subjective for everyone.

  • Auditioning is the job, rejection comes with it

  • Take stock of all that you’ve accomplished regardless of how big or small you think they are. Each step is a step forward and know that your past self would be pretty proud of you.

More Resources:

There are far greater resources out there but these are just a few things I’ve learned over the years that I wish to share with people. I’ll be adding to this as I learn more and am open to corrections and changes. I hope it helps someone.

Announcements

[Updates/End of Campaign Results] St. Jude Play Live 2022

I’m so honored and so thrilled to announced that my community helped raise $1500 for St. Jude Children’s Research Hospital Networks for St. Jude Play Live 2022! I’m blown away by the support! As a part of the Charity Braves team, a collective of Kingdom Hearts and Final Fantasy fans participating in the charity, we have raised a total of $47,198.21!

Thank you to all our generous donors and supporters who helped spread that word!


Announcements

Peony - Gate Seekers (Story Sight Studio/MediaContext)

As a part of the Young Artists’ Initiative, which trains budding artists, writers, directors, and producers to develop their skills and offer mentorship between students and industry professionals, Gate Seekers is a fantasy-adventure project starting off as an animated pilot and branching off into multiple spin-offs.

I am happy to announce that I’m lending my voice to Peony.

Cosplay

Cosplay Journal - Chadley (FF7R)

In this you will find:

  • Materials used

  • Estimated cost (often after coupons/sales)

  • ̶M̶̶̶y̶̶̶ ̶̶̶h̶̶̶e̶̶̶a̶̶̶r̶̶̶t̶̶̶f̶̶̶e̶̶̶l̶̶̶t̶̶̶ ̶̶̶t̶̶̶h̶̶̶o̶̶̶u̶̶̶g̶̶̶h̶̶̶t̶̶̶s̶̶̶ ̶̶̶a̶̶̶n̶̶̶d̶̶̶ ̶̶̶e̶̶̶m̶̶̶o̶̶̶t̶̶̶i̶̶̶o̶̶̶n̶̶̶s̶̶̶

Fabric:

  • 2 Yards of Jazz Blue Symphony Broadcloth Polyester Blend (~$3.50/yd = $7.00)

  • 3 Yards of Black and Blue Plaid Cotton Flannel (~$5.50/yd = $16.50)

  • ̶2̶ ̶Y̶a̶r̶d̶s̶ ̶E̶g̶g̶s̶h̶e̶l̶l̶ ̶S̶y̶m̶p̶h̶o̶n̶y̶ ̶B̶r̶o̶a̶d̶c̶l̶o̶t̶h̶ ̶P̶o̶l̶y̶e̶s̶t̶e̶r̶ ̶B̶l̶e̶n̶d̶ ̶(̶~̶$̶3̶.̶5̶0̶/̶y̶d̶ ̶=̶ ̶$̶7̶.̶0̶0̶)̶ ̶

Other Materials:

  • 1 Pack (2 buttons) of 22mm LaMode Gold Etched Buttons (~$5.50)

  • 1 5” Gold Aluminum Zipper (~$4.00)

  • 4” Zipper (~$3)

Other Accessories:

  • I wrote up about my Chadley wig here! (~$25)

  • Backpack (~$50.00)

  • Scarf (~<$1.00)

  • Glasses (~$10)

  • Sock Stays/Garters (~$10)

  • Socks (~$10)

  • Shoes (~$45)

I’m trying to do a better job journaling my cosplay progress for multiple of reasons.

  1. I hope it will encourage me to complete projects

  2. I can reflect back on areas I need to develop skills and research techniques for

  3. It allows me to go back to find exact fabrics/materials (if I remember writing those down in the first place)

  4. It’ll make me aware how much I spent on materials so I can cry about it.

I ordered online and there’s a 2 yard minimum for online fabric orders, so I have a lot of excess. I also ordered Eggshell Broadcloth that ended up being way yellower than I thought, so I’m forgoing that and just going to use the muslin (shh…).

The Character

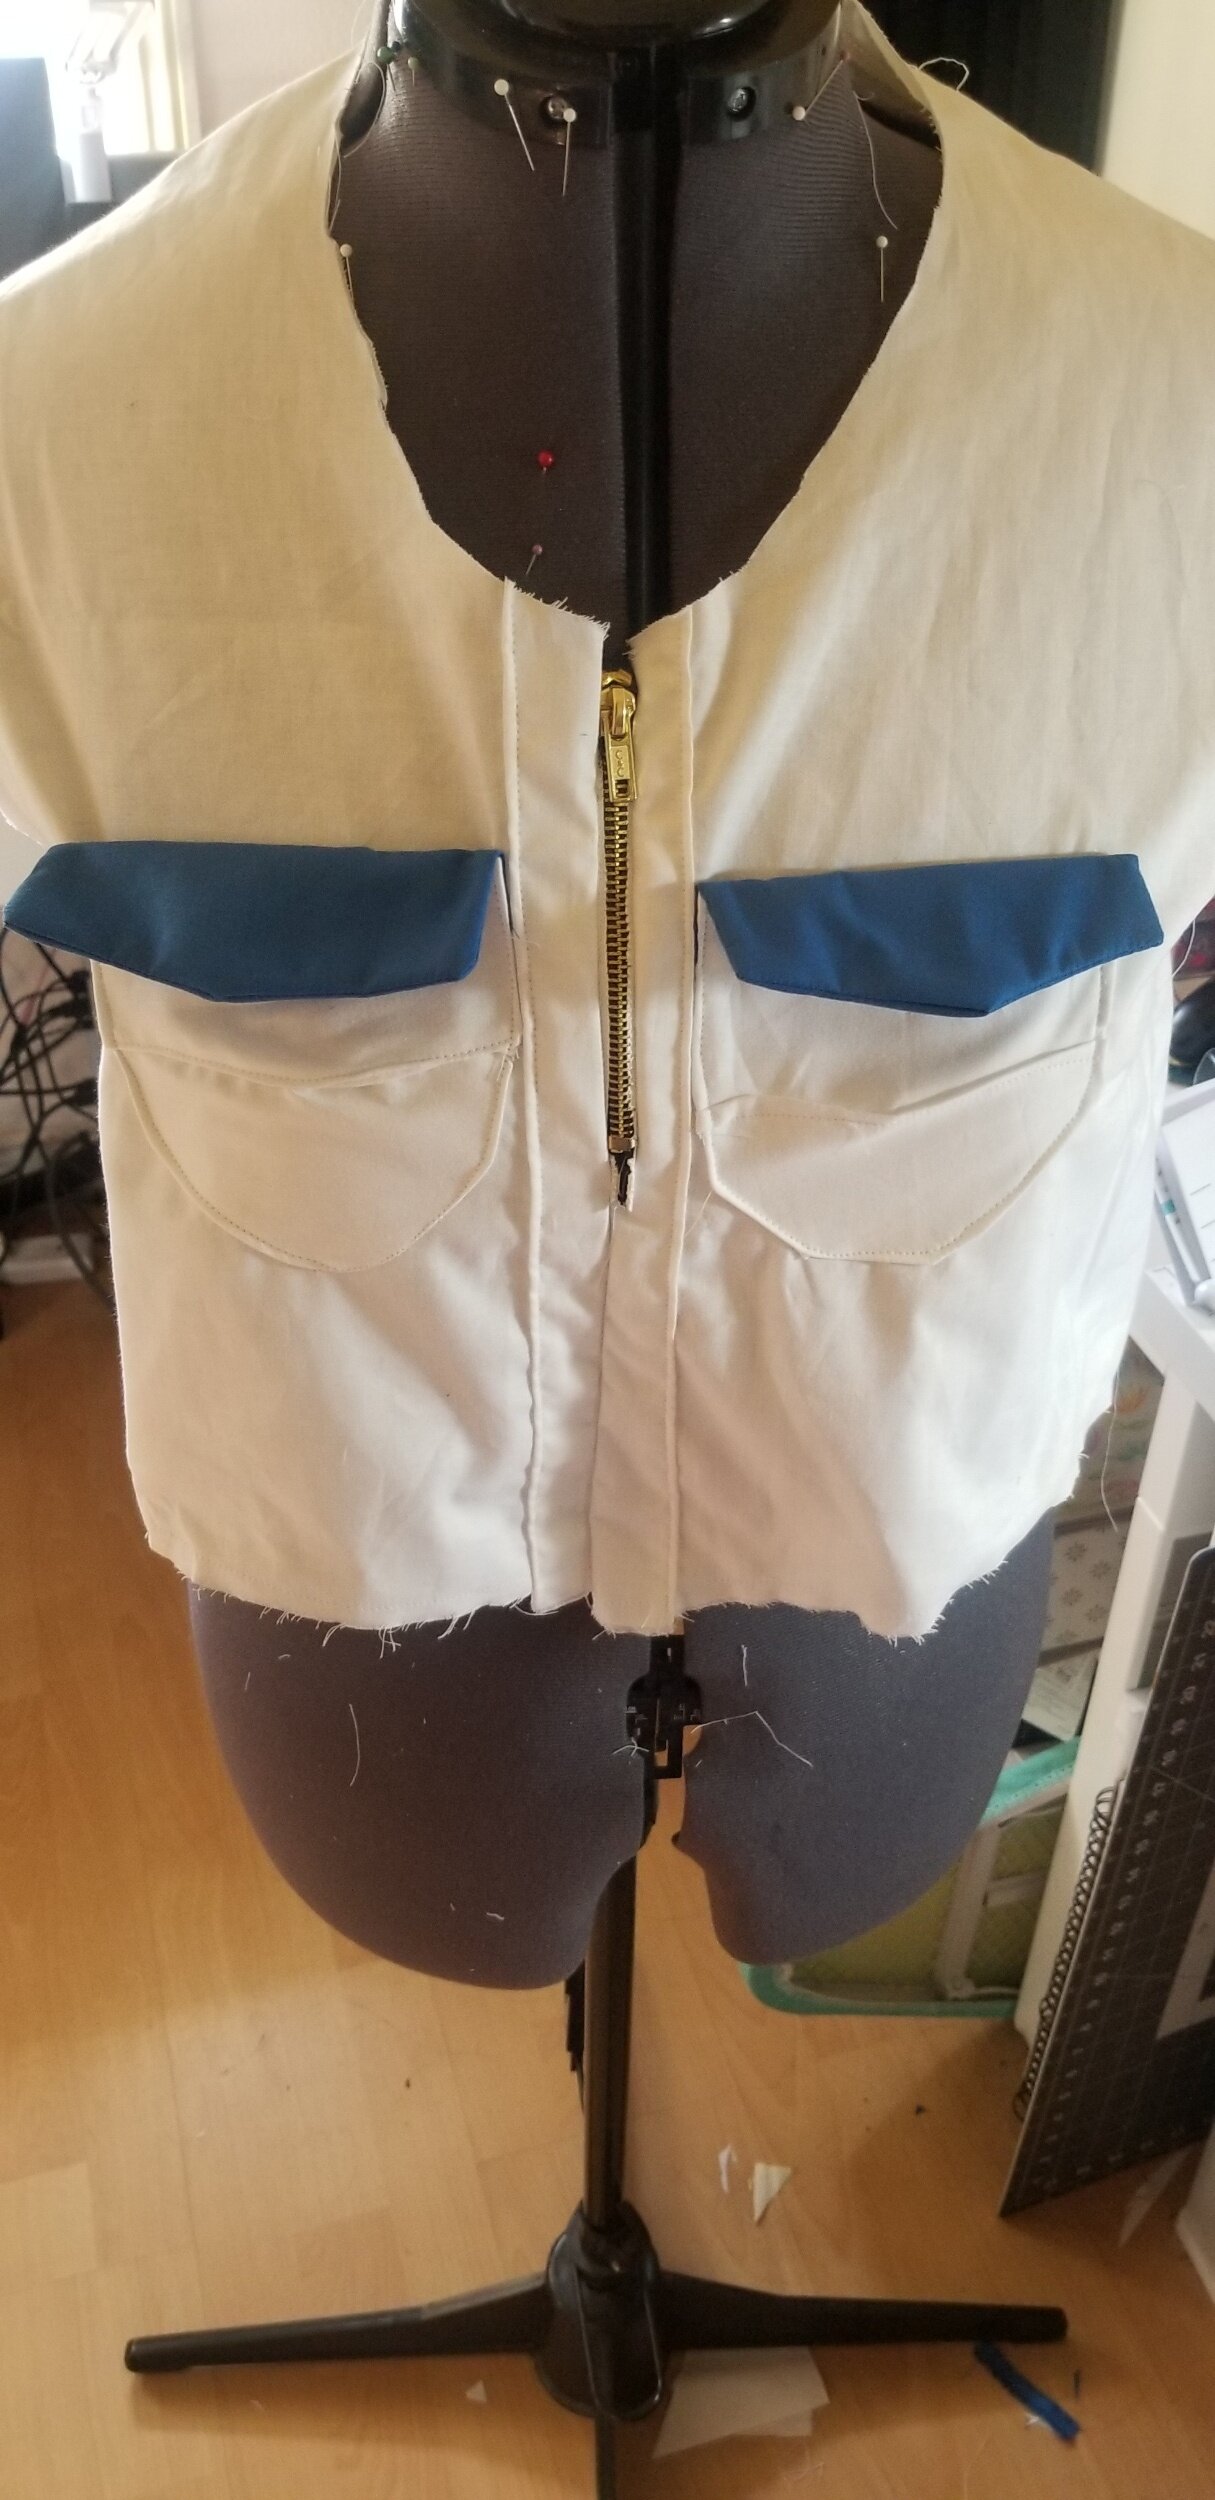
Chadley’s shirt has two seams going down the middle and a zipper that goes about half way from there. There’s also a bottom half to the shirt that doesn’t have any seams in the middle. The sleeves have a blue layer that looks more like an under layer than a trim. There’s also the blue for the pockets and the collar.

I drew it out to help me minimize mistakes for this one (I only used the seam ripper 3 times!).

Honestly, I can’t even read my notes.

Honestly, I can’t even read my notes.

Shirt

I cut out a basic shirt shape with a yoke on the back for that more “school uniform” kind of look, made the pockets, and added that to the front before attaching the front to the back. The zipper goes only about half way. I wanted to find a white zipper, but black was all I could get.

 
processed_20200701_172809.jpg
 
processed_20200701_180413.jpg

For the collar, it’s a simple peter pan style, sewing two sides together and flipping that inside out for a clean edge.

processed_20200701_181114.jpg
processed_20200701_180416.jpg

I added the gold buttons to the pockets (they’re functional pockets!), the blue layer underneath the white on the sleeves, added that weird bib part of the shirt (not photographed), and finished the bottom half of the shirt.

processed_20200722_204933.jpg
processed_20200702_000425.jpg
processed_20200702_000500.jpg

Shorts

At the time of buying fabrics, I threw in what I could for Chadley’s pants also (for that sweet, free shipping). My issue was that I couldn’t find a pattern match I liked in a material I liked and opted for a pattern I liked in a fabric…. that isn’t great. Flannel shorts sounds like a contradiction. Yet, here we are.

The shorts ended up being cursed or something. I ordered a zipper (just a zipper!) four separate times because it was either canceled or straight up lost! Finally got it on the fifth try, after driving an hour away for a zipper under $5 (why…).

I first used packing paper to trace shorts from my Angus Macdonald cosplay (that in retrospect would have worked for this Chadley cosplay *facepalm*) to use as a pattern.

processed_20200725_114348.jpg
IMG_-9mv2s9.jpg

I matched my seams, added pockets (using a serger), a front zipper and a waist band (using a sewing machine)!

processed_20200725_144952.jpg
processed_20200725_152512.jpg
processed_20200725_152526.jpg

These shorts are a bit bright compared to the character render, but this is the first time I made shorts that had pockets and a front zipper, so whatever!

processed_20200725_152502.jpg

And that’s it! Making shorts with pockets and a front zipper was way easier than I expected. I’ll revisit to add belt loops at some point, probably (probably not). It’s a simple sewing project that cost me under $200 (mostly due to the bag, wig, and shoes).

Total Cost: ~$187

Feeling satisfied enough with it, I took these phone pics using a greenish light, because I felt like that made me look like I was in the Shinra HQ building or something with all the lights from the Mako~

My phone went off as my sock stays fell…

My phone went off as my sock stays fell…

IMG_20200807_125745_711.jpg
20200808_100504_334.jpg

Cosplay

Cosplay Journal - [PROP] Promare Flame (Promare)

Here’s another Promare project because I cannot shut up about this movie.

timeline_1555007035_00031.jpg

Dangerous Ladies released a 3D printed kit and cosplayer Poisonneus fitted it with iridescent cellophane for the very colorful effect a while back. As soon as they released the kit, I was on it like….Sonic…?

After months of it just sitting on my desk, I finally added the cellophane.

processed_20200529_141916.jpg
processed_20200529_144213.jpg
processed_20200529_145621.jpg
processed_20200529_151222.jpg
processed_20200529_161118.jpg

The trick to combat the adhesive was to really make sure that the cellophane was creased on the corners. Cutting the cellophane to individual shapes of the flame works the best. Keeping scraps helps fill any missing holes.

processed_20200529_151225.jpg
Here’s what it looks like with a small LED inside of it.

Here’s what it looks like with a small LED inside of it.

The kit includes a bottom piece that is removable so you can insert things such as a lights into it, but I don’t believe mine came with the cap (which isn’t the end of the world at all). I can find an alternative to cap it up.

It wouldn’t be Promare without the eyes, right?

processed_20200529_165342.jpg
processed_20200529_165408.jpg

Cosplay

Cosplay Journal - [WIG] Noctis Caelum (Final Fantasy XV)

Background:

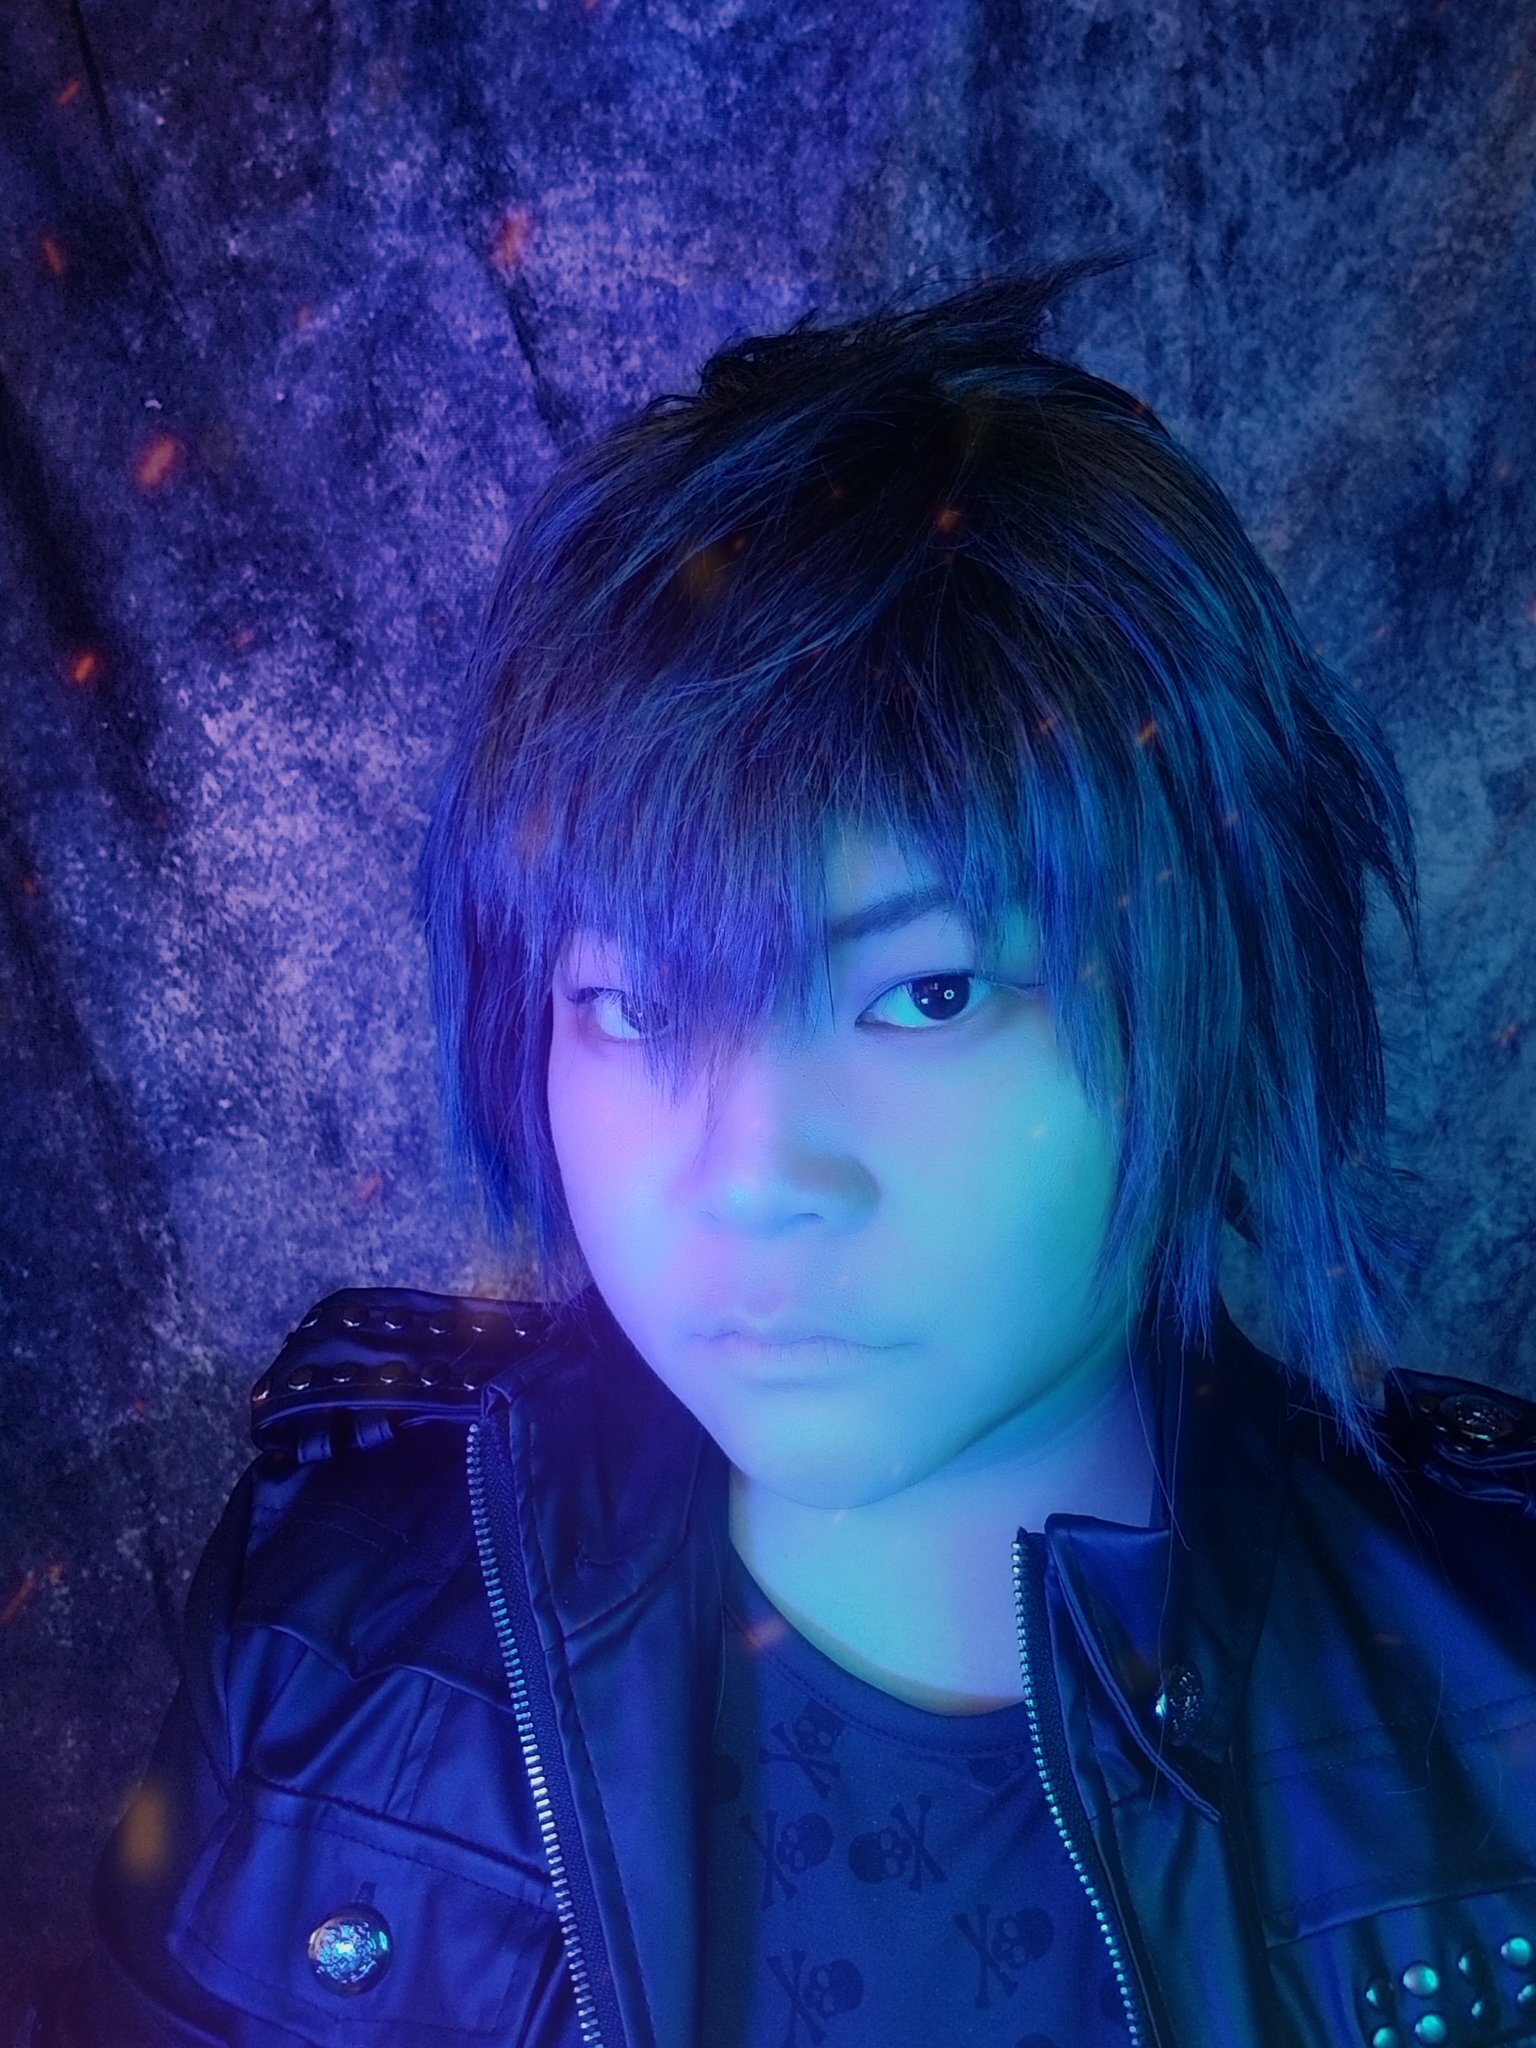
It’s no secret that FFXV is one of my top Final Fantasy games regardless of the criticism, tumultuous development histories, and rumors. I could go on and list so many reasons why I love the game, but that would be just TOO much. But all that is to say, of course I’d want to cosplay my best boy, Noctis Lucis Caelum, Prince of Lucis and King of Fishing.

In 2017, I tried. I did a genderbend Noctis with a group of friends and it was really great! (Except that it was during San Diego Comic-Con and I’m honestly too old to try to cosplay there anymore.)

Ignis is RPGadventurer Twitter | Instagram Prompto is AshleighWeasley Twitter | Instagram Gladio is SaylumCroft Twitter | Instagram Luna is Tranmasterflash Twitter | Instagram Gladio’s shield was made by TonyCos3.0 Twitter | Instagram Photography: J…
Ignis is RPGadventurer Twitter | Instagram
Prompto is AshleighWeasley Twitter | Instagram
Gladio is SaylumCroft Twitter | Instagram
Luna is Tranmasterflash Twitter | Instagram
Gladio’s shield was made by TonyCos3.0 Twitter | Instagram
Photography: Justin David Photography

Photography: Sventure Snaps

Photography: Sventure Snaps

Photography: Sventure Snaps

Photography: Sventure Snaps

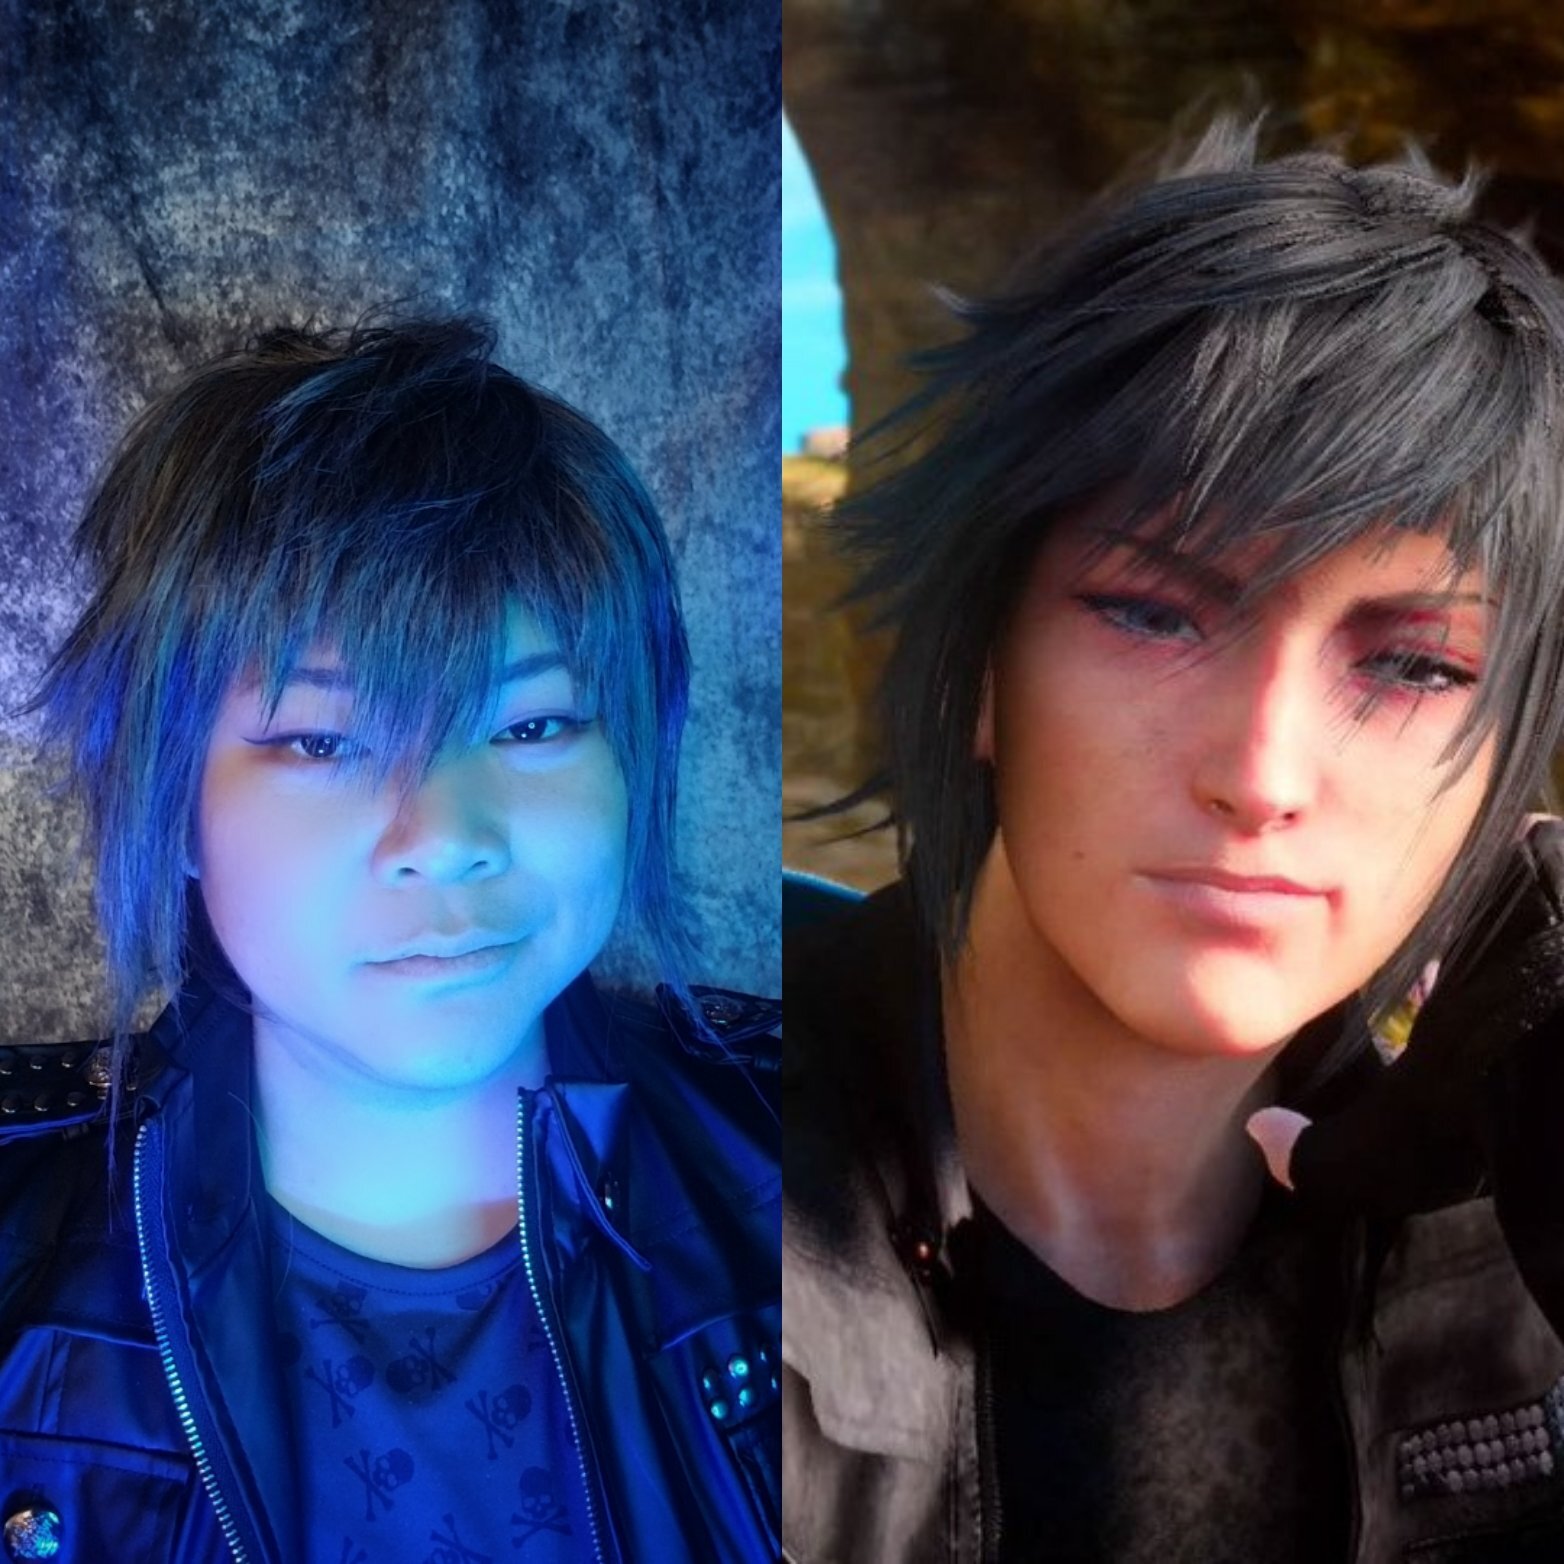
Genderbends and reimaginings are fun. But on me, with my bad sewing techniques, poor design decisions, body image issues, and making the Sword of the Father way too big, it just didn’t sit right with me. So, of course I’d want do a canon style Noctis.

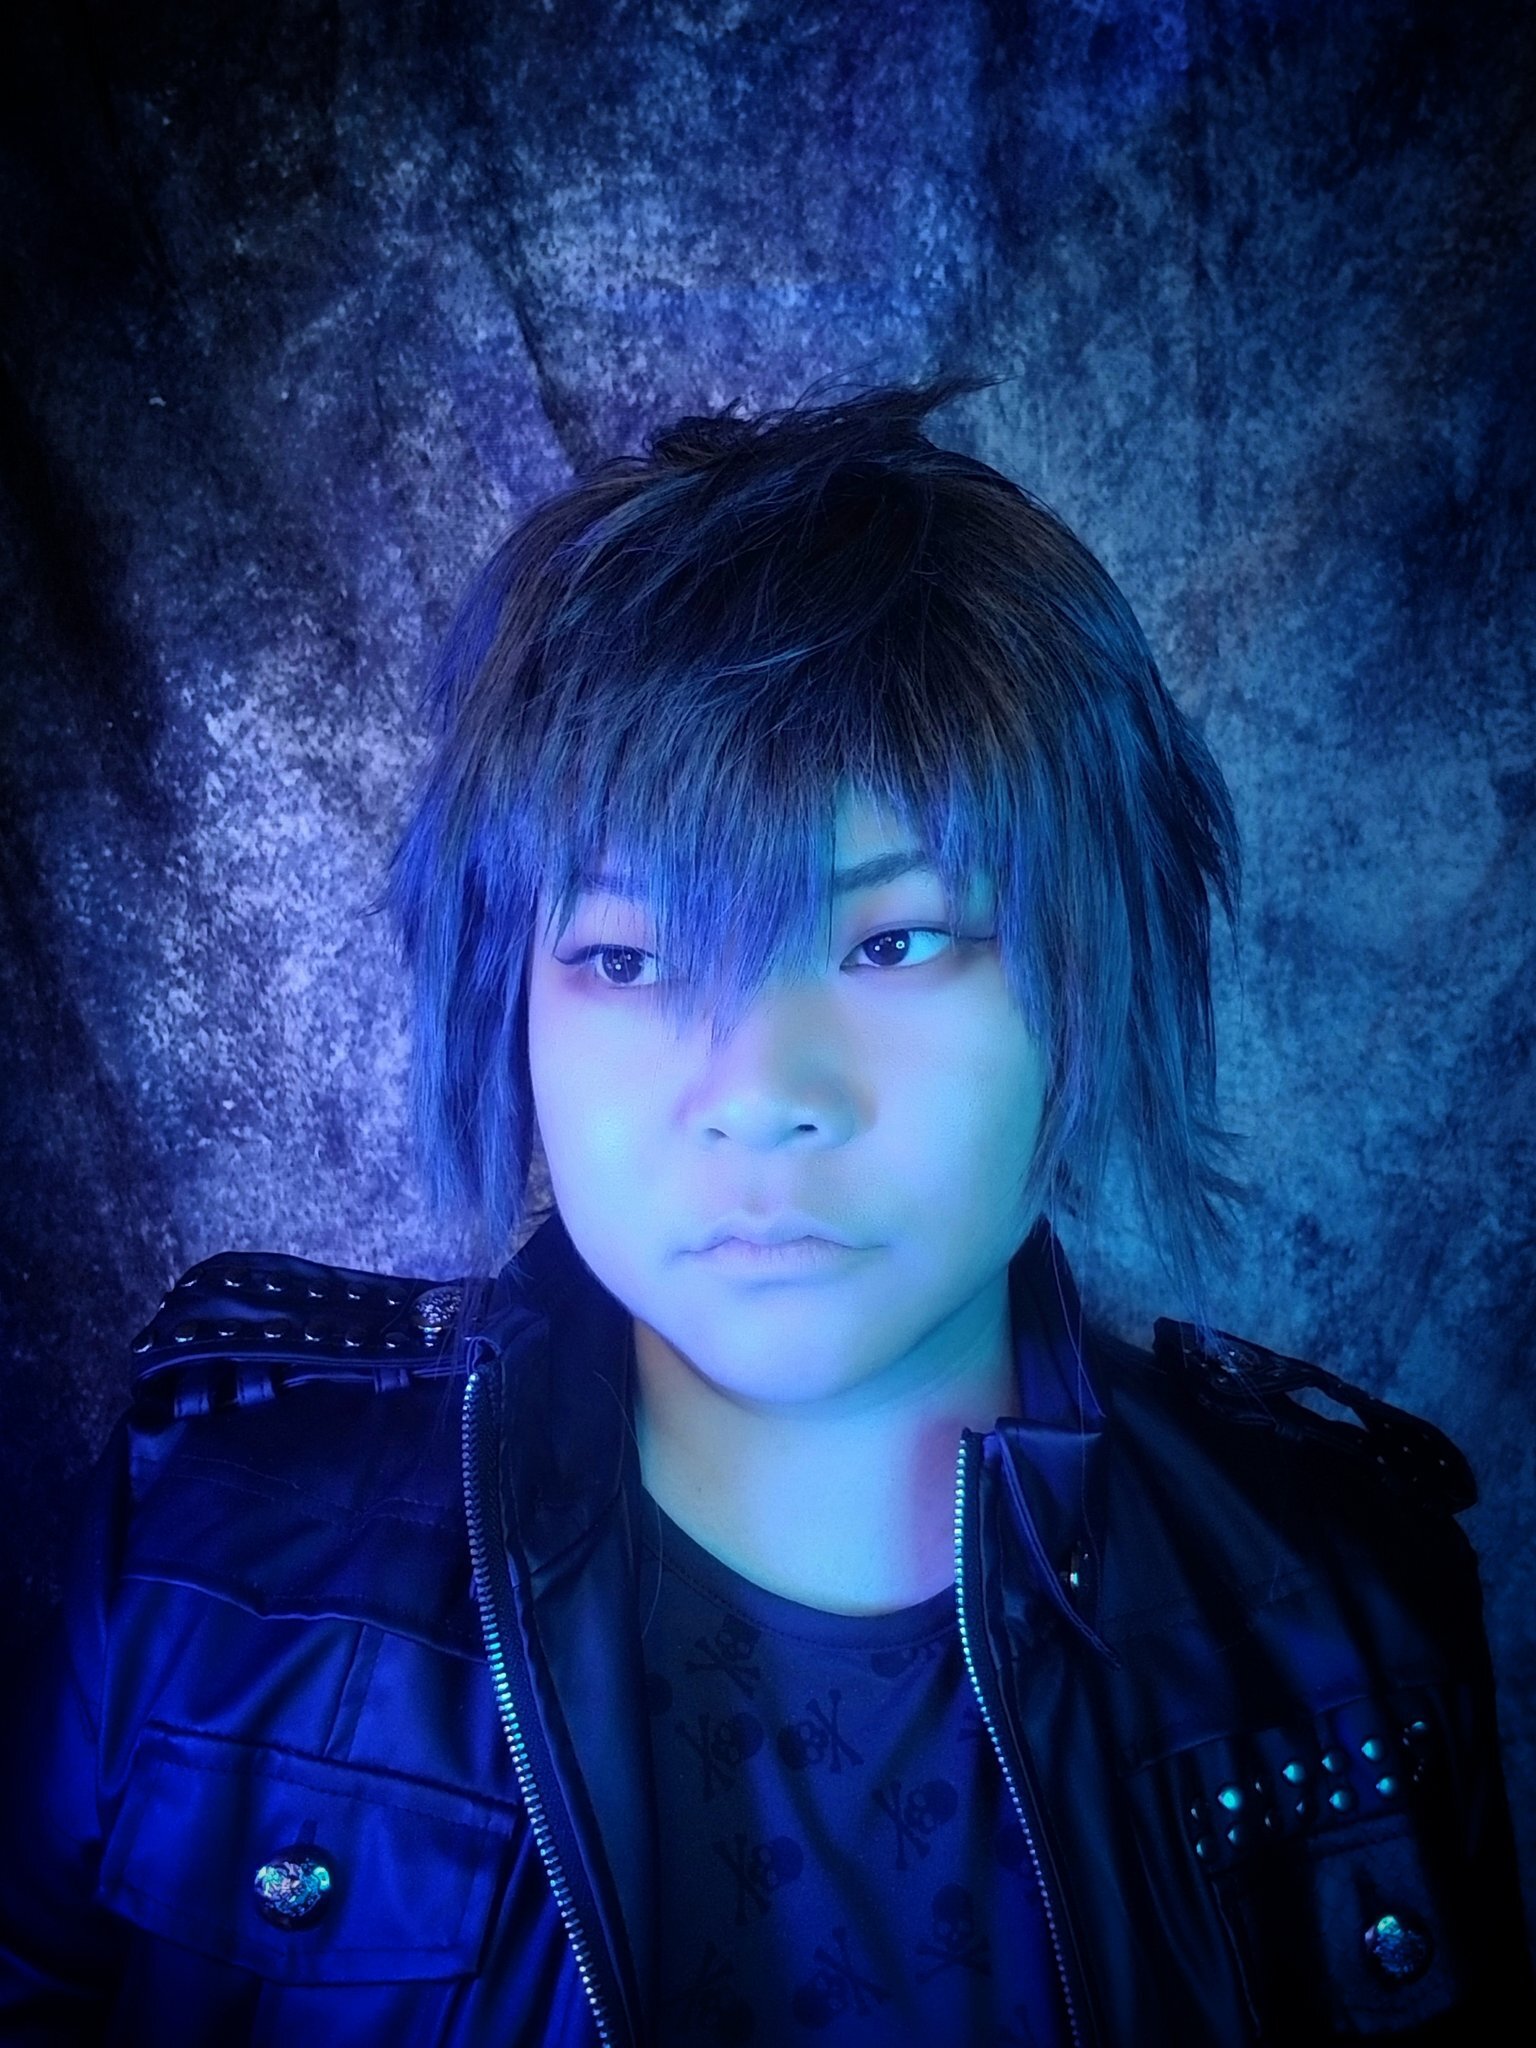
It’s taken me three years to start even on just his wig. So! Here it is.

Base Wig:

If I’m not mistaken, the base wig is a Magnum Long Classic Arda Wig in some kind of grey (I can’t find my invoice to confirm and it’s not on my account). It’s one of these colors… I think (It’s a good thing this isn’t a tutorial or a guide, because so far it’s extremely unhelpful):

IMG_20200518_164653_390.jpg
Capture.JPG

Tools:

For all my wig stuff, I use two types of scissors: Thinning Scissors (the ones with the teeth) and regular ol’ sharp hair Cutting Scissors. And I use them two ways.

  • Thinning Scissors - I cut from the top and trim down to the tip (To create layers, natural looking ends)

  • Cutting Scissors - I cut from the tip and go up (To trim/cut to length, to cut off fly-away strands)

Is this how you’re supposed to use them? I don’t kno~w!

Styling:

Starting with the base wig, like the Chadley wig, I added more layers and straightened the front.

IMG_20200518_164653_389.jpg

I blow-dried everything upside down and then hair sprayed the back. Using my fingers, I pressed the ends into small spikes and created a sort of triangle shape (or like a duck butt?) in the back. I kept the very bottom wefts alone so that it could cover my neck.

Using heat again, the hairspray hardens and the strands maintain its shape. For the very top, I teased back the top layer a bit so that it could stand up higher on the head.

IMG_-jvfkai.jpg

I cut the front of the wig to a length longer than the desired length and added layers from there. And for the sides, I added long layers so that it would stick out on the side as well as trying to make it frame the face like Noctis’ does.

After spraying the front, I used a straightener to press the tips together to create spikey shapes, but also pulled it apart gently to create more natural looking strands.

From the top of the wig, I picked out groups of strands and pulled them forward to try to make it look more natural, kind of like a plucking motion. And I also tried to pull apart fly-away strands or cut frayed edges.

processed_20200518_145620.jpg

Voila?

Mirrored Bathroom Selfie~

Mirrored Bathroom Selfie~

Annnd there it is! What do you think?

Cosplay

Cosplay Journal - [WIG] Chadley (Final Fantasy VII Remake)

It’s been 23 years since the original Final Fantasy 7 and 15 years since a tech demo released showing FF7’s opening in updated graphics. From that point, fans were begging for a fully fledged remake and it finally released in 2020! Probably one of the most anticipated games in history due to the classic and iconic nature of the original, I’d say the title sold itself. The remake is slated to be episodic and upon release proved to be way more than what people were anticipating. Rather than a full 1:1 copy, it was reimagined, rewritten, and reworked to give an expanded, clarified, and detailed look into the FF7 universe, giving greater depth for beloved characters and introducing new characters, like this nerd here:

maxresdefault.jpg

Meet Chadley! I instantly screamed when I read his name because of how absurd it sounded to me (sorry to any IRL Chadleys out there). Chad + Bradley is an all new monstrosity that somehow fits his character. He just a kid you simultaneously want to tease and want to protect at the same time. In game he’s a teen intern hoping to “undermine” his company’s efforts by helping the heroes with new items. So, of course, I had to try to cosplay this good, good boy.

FYI, this is not a tutorial. I have no idea what I’m doing.

The Base Wig:

I took Arda’s Skyelar Classic Wig in Victory Blonde (CL-053A) and straightened it loosely so the curls weren’t as tight, but the wave was still present.

Straightening + Cutting

As the the wig straightened, it became quite long! So I cut the wig to a length that was just at the shoulders first, before cutting even shorter, leaving the bangs for last. Knowing how many mistakes I make, it’s best for me to cut little by little. I can always make it shorter, but I can’t make it longer!

Create Layers

In order to create layers, I separated parts of the hair into thirds creating a top, middle, and bottom layer, making the top layer the shortest and the bottom layer the longest. Using thinning sheers, I cut it at an angle to make sure that the top layer was always the shortest, but with the thinning sheers, I think it creates a more natural look because not everything is cut straight across. And because of the waves already present in the wig, it created it’s own voluminous look.

20200423_144512.jpg
20200423_144508.jpg
20200423_144344.jpg

Heat + Set

I repeated the process until the shape started to look as close to the character as I could create it. For the bangs, I put the wig on my face and cut it from there. Lastly, I used my hot iron to create additional curls and set the entire thing with a light coat of hair spray.

20200423_154618.jpg
battle-intel-manual-final-fantasy-7-remake-wiki-guide.jpg
20200423_211620_442.jpg

And that’s it! I’m actually quite proud of this one even though it’s so simple, since my other attempts at styling have either been super basic or not quite executed as well. I hope to be able to cosplay him fully at a convention soon.

hqdefault.jpg
IMG_20200423_181035_686.jpg

Cosplay

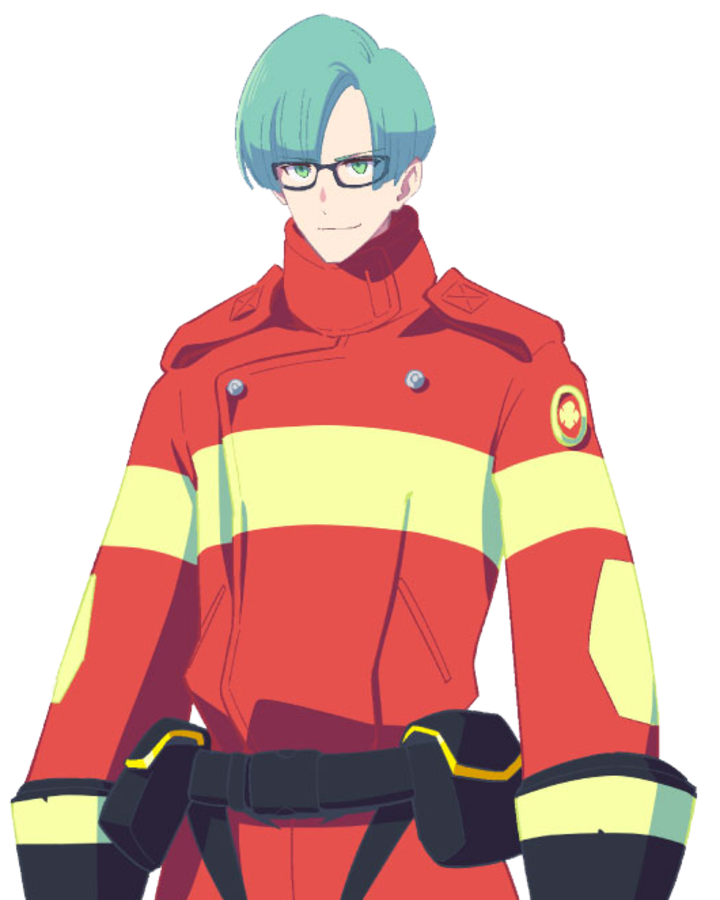
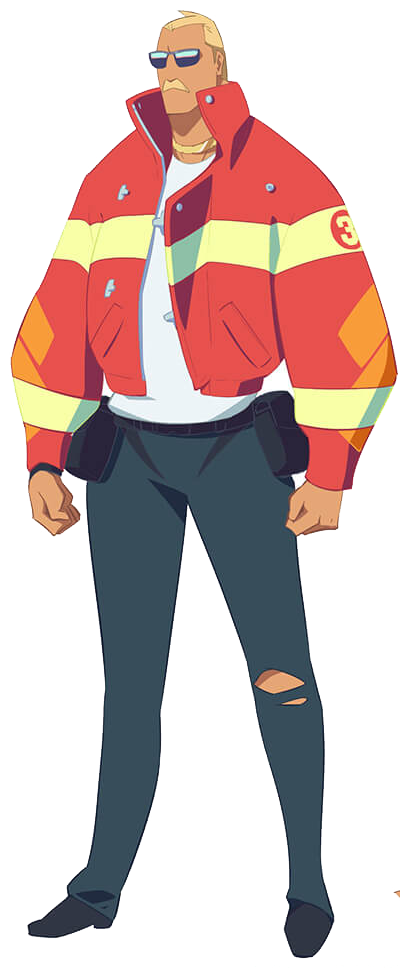
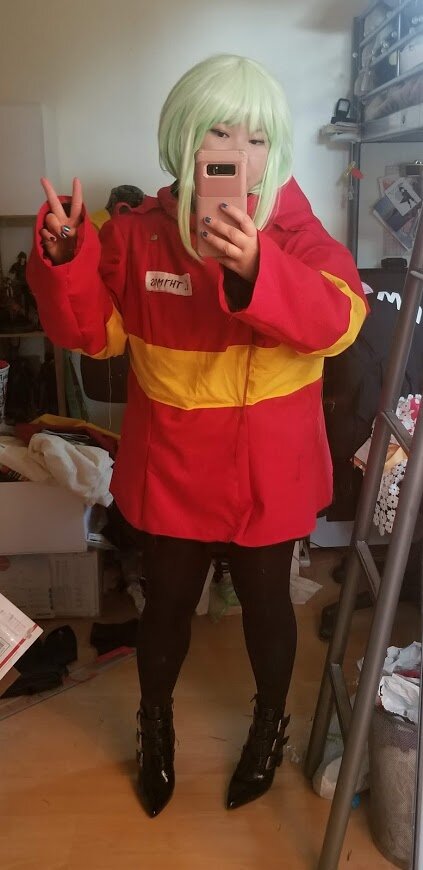
Cosplay Journal - Burning Rescue Jacket (Promare)

In this you will find:

  • Materials used

  • Estimated cost (often after coupons/sales)

Materials:

  • 4 yards red cotton blend fabric (~$20)

  • 3 yards black fabric (denim?) (~$20)

  • 1 yard yellow cotton blend fabric (~$5)

  • 1 yard yellow vinyl (didn’t use) (~$5)

  • Snaps (~$5)

Other Items:

  • Wig ($20)

  • Boots ($40)

Background Info:

I had known of Promare due to work, but never looked into more than what I had to do. In fact, I was exposed to the keyart and some info prior to its debut in the states, but didn’t think anything of it beyond what I needed to do. Even after talking to those working on the project and its distribution, I simply thought, “oh, another Anime movie.”

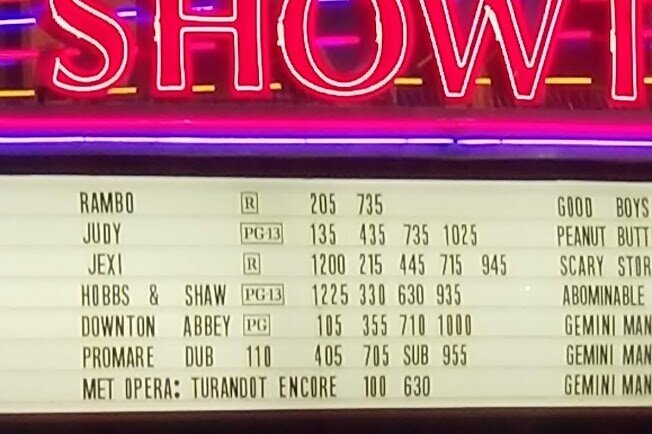
Fast forward to September when it was released in theaters. I had seen fanart of it from Japanese fans, and was really interested in the design of one particular character. Because of that plus having heard its name for work so many times, I went to go see it. I drove out 40 minutes out to a theater that was showing this limited released foreign movie. I watched it, and I thought it was okay.

 
20191016_203650.jpg
 

And then I got home.

And then I thought about it.

And then I hadn’t stopped thinking about it.

And then I realized, “Wait. This movie is really good.”

Because of my vocal fanaticism, I was invited to talk about it on a web show and invited to participate in a fan-made zine. I ended up watching it a total of 5 times in theaters (I’ve heard of people watching it 16 times in LA and one case in Japan of someone watching it close to 100 times!):

maxresdefault.jpg
20191121_140310.jpg
  1. The fated first time (dubbed)

  2. Again, by myself (subbed)

  3. With friends who wanted to know what the heck I was talking about (dubbed)

  4. When it came back to theaters as “Promare REDUX” due to popularity (even after getting extended showings) (subbed)

  5. When it returned as a 4DX showing (and that was a WILD RIDE) (dubbed)

After the first showing, I had already bought a Lio Fotia wig (as well as the 1/7th figure statue because I have no willpower), so of course I was going to cosplay for the REDUX showing.

But, I didn’t think I could confidently pull off a form fitted leather outfit, and 12+ belts and at least 4 zippers. So instead I went with making the fire fighting team’s jacket instead and mashing the two concepts.

Construction:

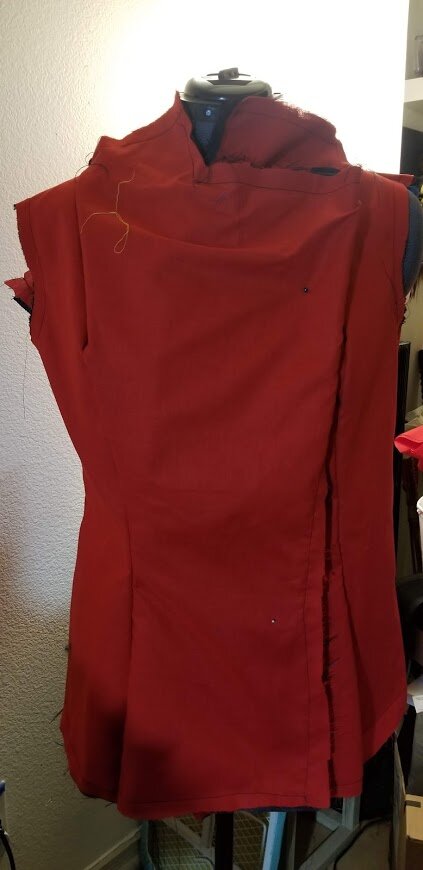
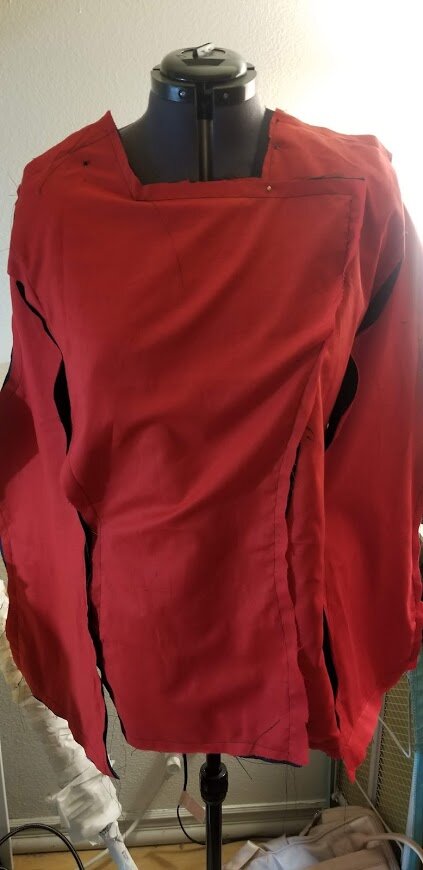
For this, I used my new serger machine (or I guess people also call them overlock machines) for the first time. The machine is pretty scary at first. Not only is it loud, it seems super powerful. (I did accidentally run a pin through it as the serger was also cutting the edges and cut the pin clean through!)

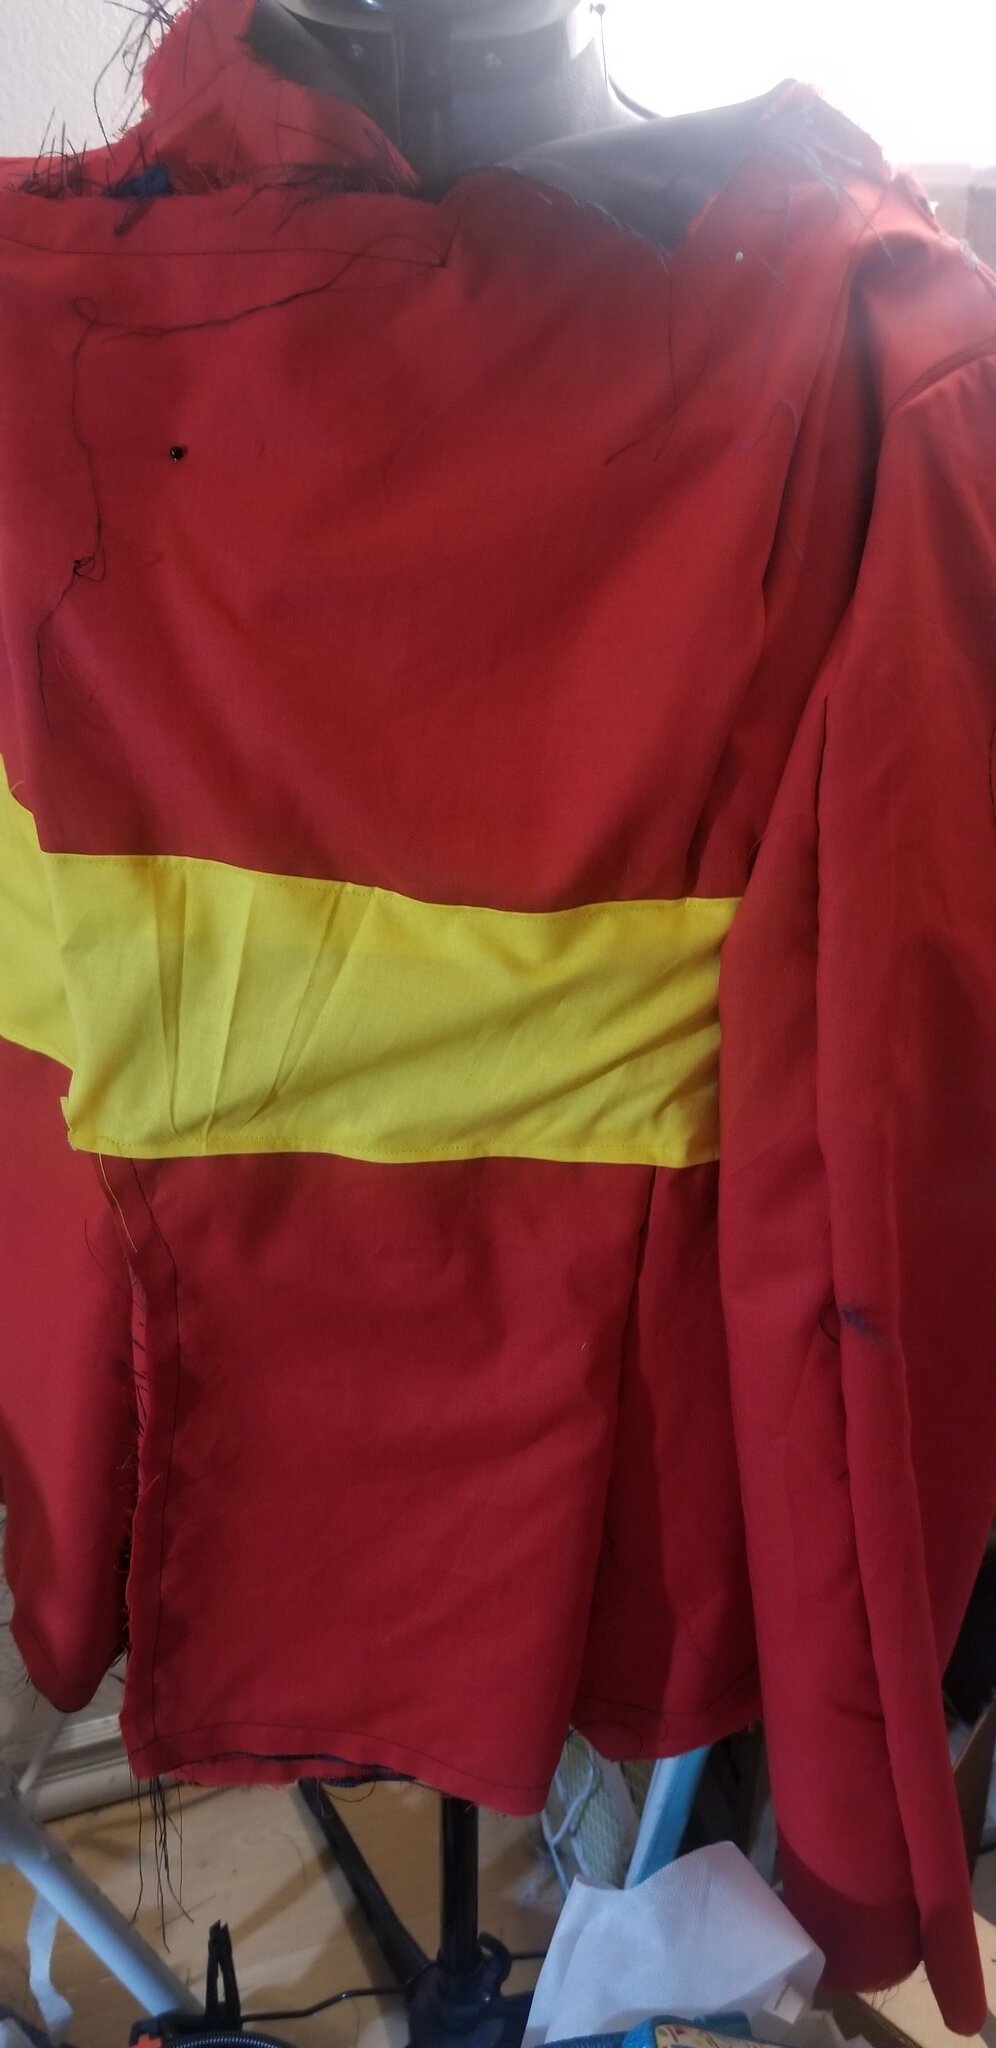
But the most impressive thing is that I actually, sort of lined something, this time. Although, that was a necessity. The red fabric I bought felt and looked too light and was somewhat transparent. So, adding the dark fabric underneath made it look heavy like protective wear.

 
20191129_171224.jpg
 

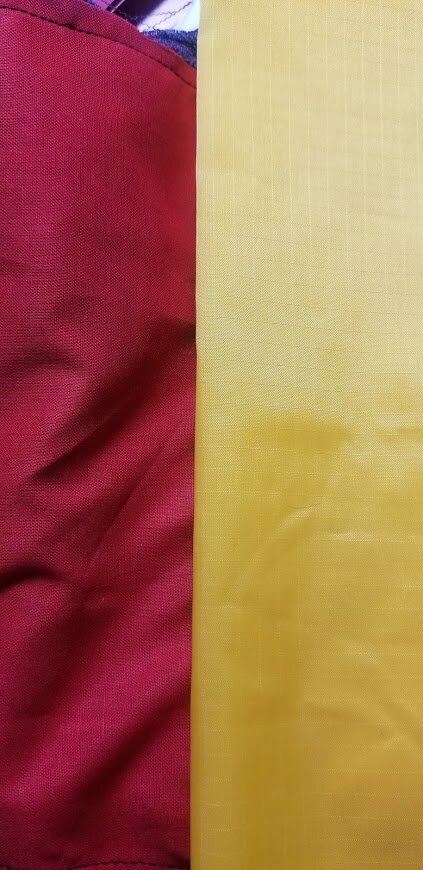
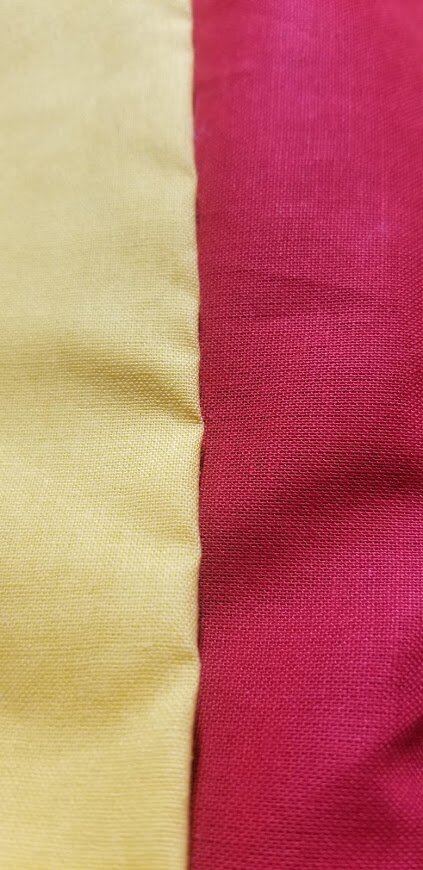
I found two yellow fabric that I wanted to potentially use. One was almost a reflective-looking vinyl and the other was the same material as the red fabric. I ran a twitter poll and people opted for the latter!

At the same time, my sewing machine kept giving me errors that I coudln’t figure out how to solve. A serger is not a sewing machine. It’s not meant to do what sewing machines do. But here we are...

This ended up being serge’d together in very convoluted ways.

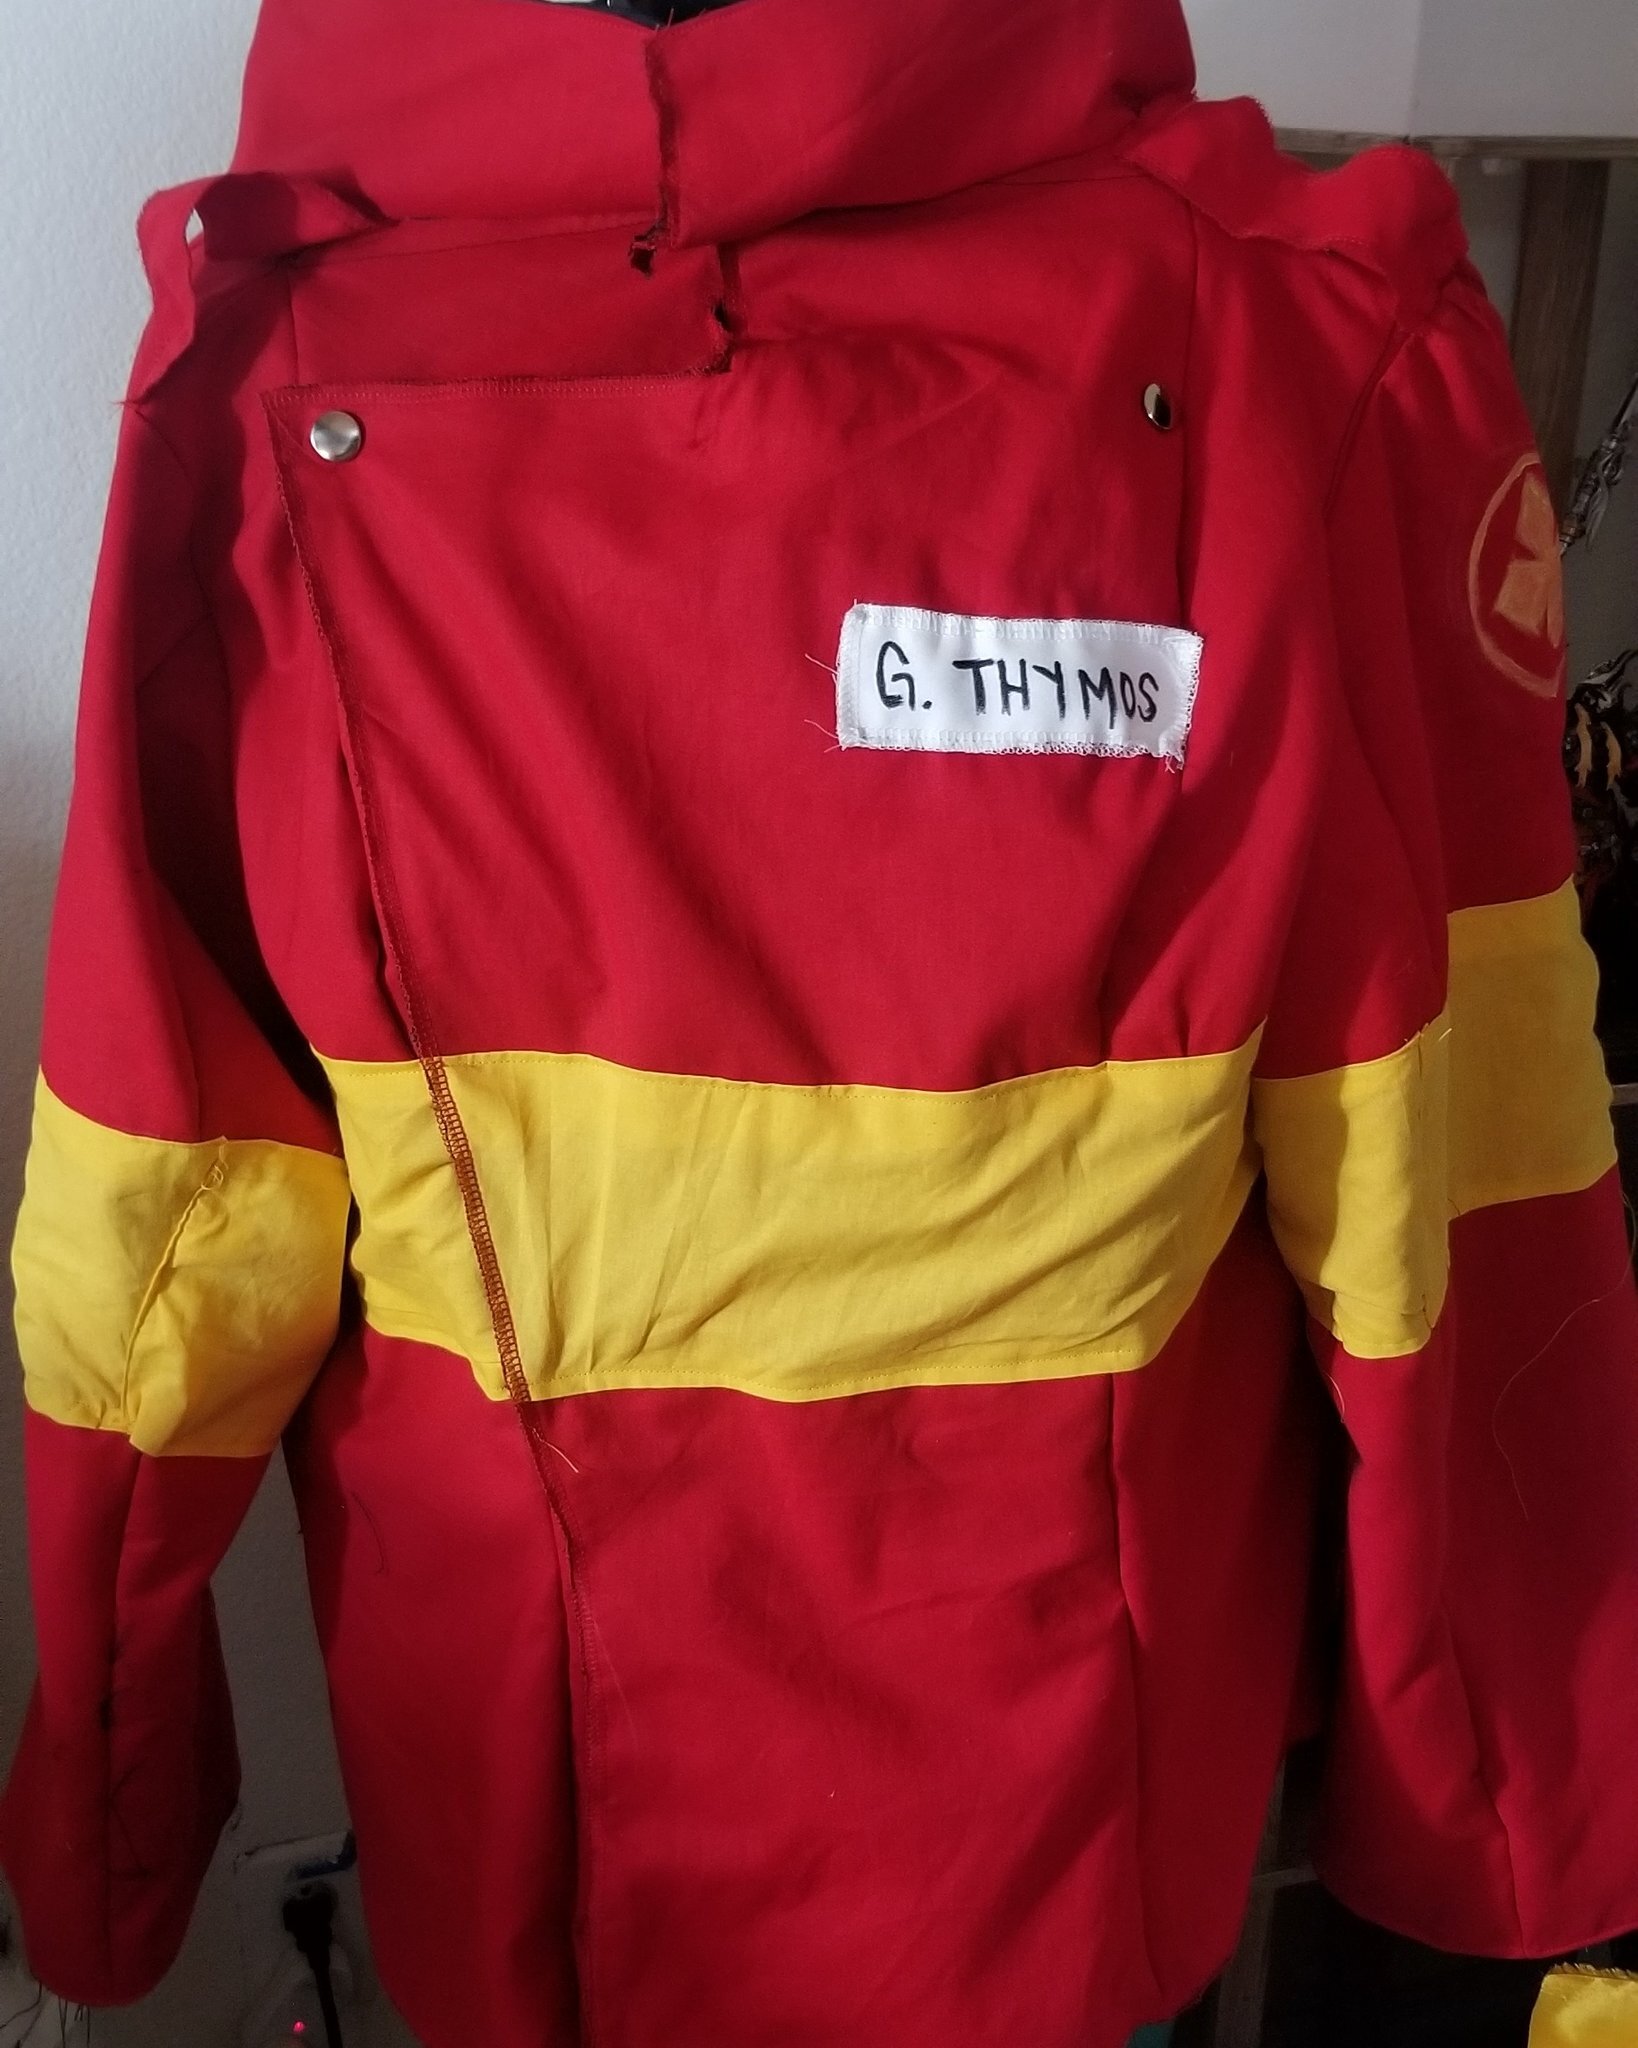
I added the button snaps according to the reference (or at least to the best of my ability) and added additional hidden snaps along the jacket opening and the collar where I wanted a zipper (but because my sewing machine wasn’t cooperating, I had to make due).

For my own indulgence, I added a name tag and due to lack of time, talent, and/or resources, I painted the emblem on the jacket.

Conclusion:

It may not be the best Burning Rescue jacket, but I felt like I was able to construct this in a way that it could hold up for a while. I was happy that it was well received at the showing, too! But the best thing to come out of this whole endeavor had to be the splurge on the shoes.

 
20191106_175136.jpg
 

I would like to revisit this one day to add a patch to where I painted the emblem and add pockets. I was happy that I got to re-wear this at the 4DX showing, as well!

 
20191208_123620.jpg
 

Cosplay

Cosplay Journal - Annette (Fire Emblem: Three Houses)

In this you will find:

  • Materials used (not including mock muslin which I buy in bulk)

  • Estimated cost (often after coupons/sales)

Materials:

  • 4 yards Polyester Black (~$30)

  • .5 yards Gold Performance Vinyl (~$10)

  • 3 Offray 3/8"x9' Firefly Metallic Woven Wired Edge Ribbon-Gold (~$5)

  • 1.5 Yards Gold Trim (~$5)

  • Gold tassel trim ($5)

  • Horsehair Braid ($9)

Other Items:

  • Purse ($10)

  • Boots ($20)

  • Wig ($30)

FYI, this is not a tutorial. I have no idea what I’m doing.

Background Info:

A few friends in a cosplay group for FE3H were missing a few characters including Annette, so I asked if I could join for Anime Los Angeles (January 10-13 - Ontario, CA).

Annette is an adorable character that loves to sing and bake (opposite of me). Her design, aside from her uniform, is very soft, round, and friendly. Her uniform matches the typical Gareg Mach uniforms (very inline with characters like Lysithea, and nothing too modified like Hilda or Dorothea), but has a pouch that is unique to her.

 
feth-annette-concept.jpg
 

The Mock-Up:

I made a muslin mockup without a pattern by draping the fabric over the dress form and pining shapes to where I think they're supposed to go.

 
processed_20191102_222043.jpg
 

Construction:

I think what is commonly used is a Polyester/Cotton blend material for the uniforms. However, I went with a full polyester fabric because of the weight and feel of the underside. I feel like I won’t need to add a lining to it. It does appear shinier (oops), but it also appears blacker (Yay), which is also why I went with it.

Using the muslin mockup, I cut the black fabric to the same shapes and begin pinning that to the form.

I used the Offray Ribbon for the details. I’ve seen people use iron on vinyl which produces a nice, clean shape.

processed_20191221_235518.jpg
processed_20200109_002436.jpg
processed_20200110_200523.jpg

Wig

I picked a Peach wig from Arda Wigs because I felt like it matched Annette's hair color closest. I would have picked a straight style but items were on backorder. So I opted for their Ferrari style (wavy) and straightened it with a flat iron. Annette has two loops in her hair for some reason. In order to capture that shape, I used horsehair braid, which is a stiff polyester used to hold shapes in trims. I adhered that to the wig using Got2B hair gel. I left some strands on the side, rather than pulling it back because I like to hide the sides of my face with hair.

Annette_Portrait.png
processed_20191226_184531.jpg
processed_20191226_185109.jpg
processed_20200110_222241_897.jpg

Details

My apoxie sculpt ended up drying up and I couldn’t figure a way to salvage it. So I used moldable foam to create the pieces and glued a safety pin to them to pin to the skirt and top. It wasn’t the best sculpting work, but it’d have to do. I was definitely too embarrassed to photograph it close up.

I painted the gold trim black since I didn’t want an excess of the gold. It didn’t quite work, but it didn’t not work… It actually looked kinda cool when it caught the light- like a black gold kind of effect. That, or I’m trying too hard to justify what I’ve done.

I could not find any buttons that had the same shape I wanted, so I painted the button covers black and sewed those on without the bottom half of the button covers. I had the same problem with painting the gold trim, that the black paint didn’t stick well (granted, it was cheap acrylic paint). But shhhh….

processed_20200108_215814.jpg
processed_20200109_002455.jpg
processed_20200110_214718.jpg
processed_20200110_214814.jpg

Post-Con Thoughts:

At con, the glue ended up peeling off of the boots and the foam pieces and things started falling off. (I even lost one without knowing!) The buttons were extremely loose given the shape and how I sewed them on. The ribbons didn’t capture the look I was going for, either. In the future, I'd like to use 3D printed pieces for the embellishments and buttons. I’ve seen others use iron on transfer for the design, but I wanted something with more texture (which is why I chose the type of ribbon in the first place). I would use a different kind of trim in lieu of the ribbon or embroider the design.

This did end up being cheaper than buying it from a costume/cosplay shop, though, and was really fun to try and pattern myself! I definitely learned the importance of not taking any shortcuts and have ideas to plan out my construction a little bit better.

 
processed_20200110_222356_963.jpg
 

Events

Event - Final Fantasy VII: "Tree-make"

I made one bad play on words between “Remake” and “Treemake” while reading information on the Amazon fires and decided to host a Final Fantasy VII Remake themed tree planting party. It turns out that the University of California in Irvine hosts tree planting events regularly.

These events consists of re-potting growing plants, picking weeds, and shipping some to various areas. Anyone can sign up to help at: http://shadetreepartnership.org/

Final Fantasy VII TREE-Make.png
FinalFantasy7.png

Events

Event - Fire Emblem: "Tea" Houses Tea Party

I will take any excuse to have a tea party but having a Fire Emblem: Three Houses themed tea party is the perfect excuse.

In game, players are able to invite various faculty and students to a tea party for various reasons:

  • Increase charm/charisma stats to increase battalion gambit attacks and gambit damage.

  • Increase support levels between player character and party member.

  • Pretend that you’re taking your favorite character on a pseudo-date

The tea house of choice is the Tea House on Los Rios located in San Juan Capistrano, CA. It’s pretty far south of Los Angeles, but it’s located in a historic district with a train station and nearby petting zoo. The ambiance wasn’t quite Garreg Mach, but it was a wonderful time with delicious teas and sandwiches and great company talking about Fire Emblem (and Persona…. and Final Fantasy…).

fireemblem.png
Savephiles_FireEmblem_HomePage.PNG

Events

Event - Final Fantasy XV: Ardyn DLC Day Meet Up

This came together because I was browsing cake designs for no reason and came across the dripping cake designs.

Being hyper-fixated on Final Fantasy XV “at the time” (still to this DAY), my natural reaction was “OH! Scourge cakes!” (The “Scourge” being an in game plague of sorts). And of course this aligned with the release of the DLC for Final Fantasy XV, Episode Ardyn.

Just a couple months before, the other planned content for FFXV were cancelled during a series of very disappointing live-streamed announcements. So a party like this, complete with an Ardyn Pinata, felt like a nice way to end the FFXV era. (Except the fandom continues to thrive on the scraps of lingering content).

From the bottom of my heart, thank you FFXV for being there when I needed it the most and for representing and meaning so much.

Events

Event - Kingdom Hearts: "Simple & Clean Up"

I knew I wanted to host a beach clean up and of course I decided to shoehorn my fandoms into this event.

Like many mid-20s to 40-year-olds, Kingdom Hearts has been an huge influence on my life and has been a constant since the first time I played Kingdom Hearts was in elementary school, to now as I enter my late 20s. It’s the themes, designs, aesthetics, in addition to the symbolism, and emotional dynamics between characters that remain relevant across generations and age groups. So despite the changing of world, the act of aging, maturing, and social or political awakenings, the entire series has become something you don’t simply “grow out of.” The design may be at times too bright with a quirky cast of licensed mascots, but there’s no line of exclusion- nothing to say “this is for kids” or “you’re too old for this.”

So naturally because beaches are an icon setting for Kingdom Hearts, a Kingdom Hearts themed Beach Clean Up just made sense.

Picking a beach for this event was easy, but getting a confirmation was not. With Earth Day coming up at the time I had sent in a request form, it took an uncomfortably long time to receive an answer. What felt like 100 phone calls later, eventually 15 days before the event, I received a confirmation on the date and location of the beach clean up.

Two prizes were provided for those who picked up the most trash. And these prizes- Sora and Riku pop-figures- were awarded to two brothers who unquestionably picked up the most trash.

The highlight of the day was the Frisbee being thrown into the bonfire pit. It was either bad luck, the wind, or and impressive display of athleticism. But regardless of how it went down, it went down in the most gut-busting way and with everyone’s knees buckling in disbelief and shock, gasping in the smoke and sand, tears swelling up at the corner of everyone’s eyes. Or just mine. It was hilarious.

It was eye-opening cleaning up and learning about our impact on the earth. Playing a video game series about saving planets and people, it felt appropriately uneasy learning that each plastic water bottle discarded took about 450 years to breakdown and cigarette butts took about 3-5 years to break down.

Enjoying everyone’s company at the beach, playing board games, eating junk food, and getting sunburned felt in-line with the themes of friendship and camaraderie of Kingdom Hearts.