In this you will find:
Materials used
Estimated cost (often after coupons/sales)
̶M̶̶̶y̶̶̶ ̶̶̶h̶̶̶e̶̶̶a̶̶̶r̶̶̶t̶̶̶f̶̶̶e̶̶̶l̶̶̶t̶̶̶ ̶̶̶t̶̶̶h̶̶̶o̶̶̶u̶̶̶g̶̶̶h̶̶̶t̶̶̶s̶̶̶ ̶̶̶a̶̶̶n̶̶̶d̶̶̶ ̶̶̶e̶̶̶m̶̶̶o̶̶̶t̶̶̶i̶̶̶o̶̶̶n̶̶̶s̶̶̶
Fabric:
2 Yards of Jazz Blue Symphony Broadcloth Polyester Blend (~$3.50/yd = $7.00)
3 Yards of Black and Blue Plaid Cotton Flannel (~$5.50/yd = $16.50)
̶2̶ ̶Y̶a̶r̶d̶s̶ ̶E̶g̶g̶s̶h̶e̶l̶l̶ ̶S̶y̶m̶p̶h̶o̶n̶y̶ ̶B̶r̶o̶a̶d̶c̶l̶o̶t̶h̶ ̶P̶o̶l̶y̶e̶s̶t̶e̶r̶ ̶B̶l̶e̶n̶d̶ ̶(̶~̶$̶3̶.̶5̶0̶/̶y̶d̶ ̶=̶ ̶$̶7̶.̶0̶0̶)̶ ̶
Other Materials:
1 Pack (2 buttons) of 22mm LaMode Gold Etched Buttons (~$5.50)
1 5” Gold Aluminum Zipper (~$4.00)
4” Zipper (~$3)
Other Accessories:
I wrote up about my Chadley wig here! (~$25)
Backpack (~$50.00)
Scarf (~<$1.00)
Glasses (~$10)
Sock Stays/Garters (~$10)
Socks (~$10)
Shoes (~$45)
I’m trying to do a better job journaling my cosplay progress for multiple of reasons.
I hope it will encourage me to complete projects
I can reflect back on areas I need to develop skills and research techniques for
It allows me to go back to find exact fabrics/materials (if I remember writing those down in the first place)
It’ll make me aware how much I spent on materials so I can cry about it.
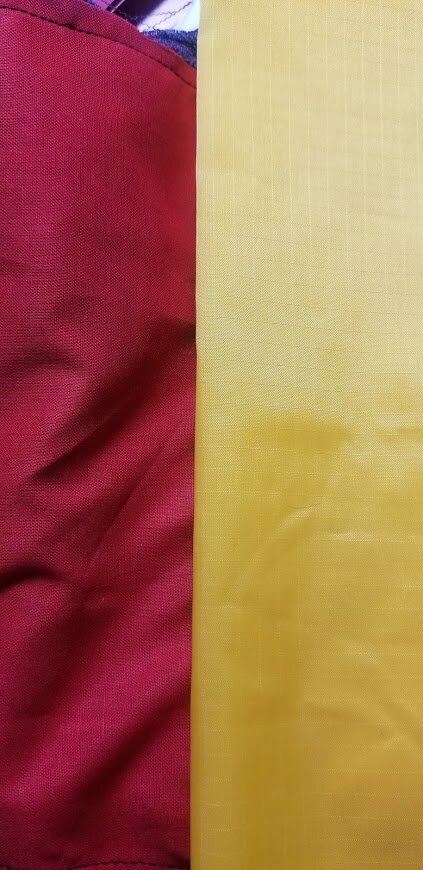
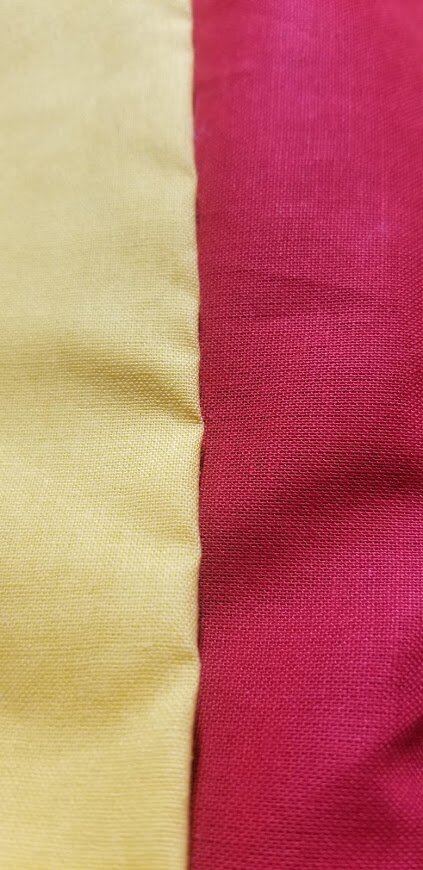
I ordered online and there’s a 2 yard minimum for online fabric orders, so I have a lot of excess. I also ordered Eggshell Broadcloth that ended up being way yellower than I thought, so I’m forgoing that and just going to use the muslin (shh…).
The Character

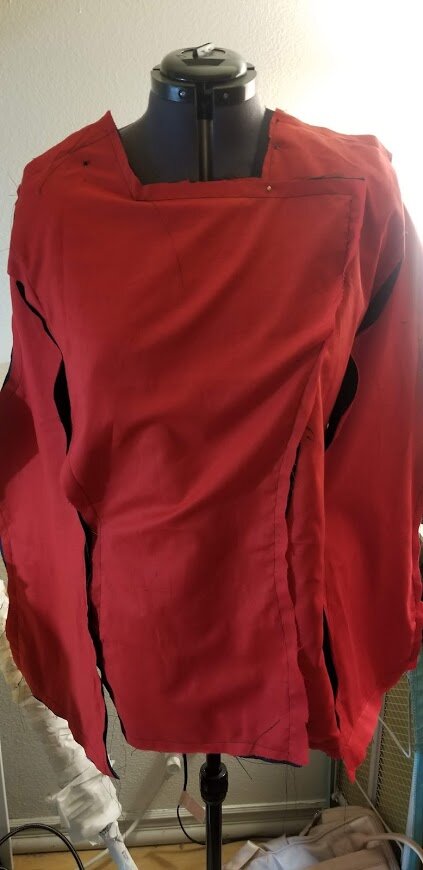
Chadley’s shirt has two seams going down the middle and a zipper that goes about half way from there. There’s also a bottom half to the shirt that doesn’t have any seams in the middle. The sleeves have a blue layer that looks more like an under layer than a trim. There’s also the blue for the pockets and the collar.
I drew it out to help me minimize mistakes for this one (I only used the seam ripper 3 times!).

Honestly, I can’t even read my notes.
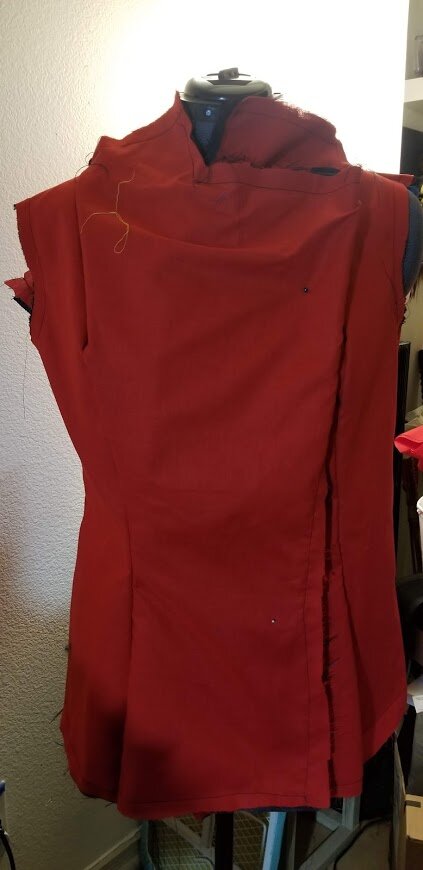
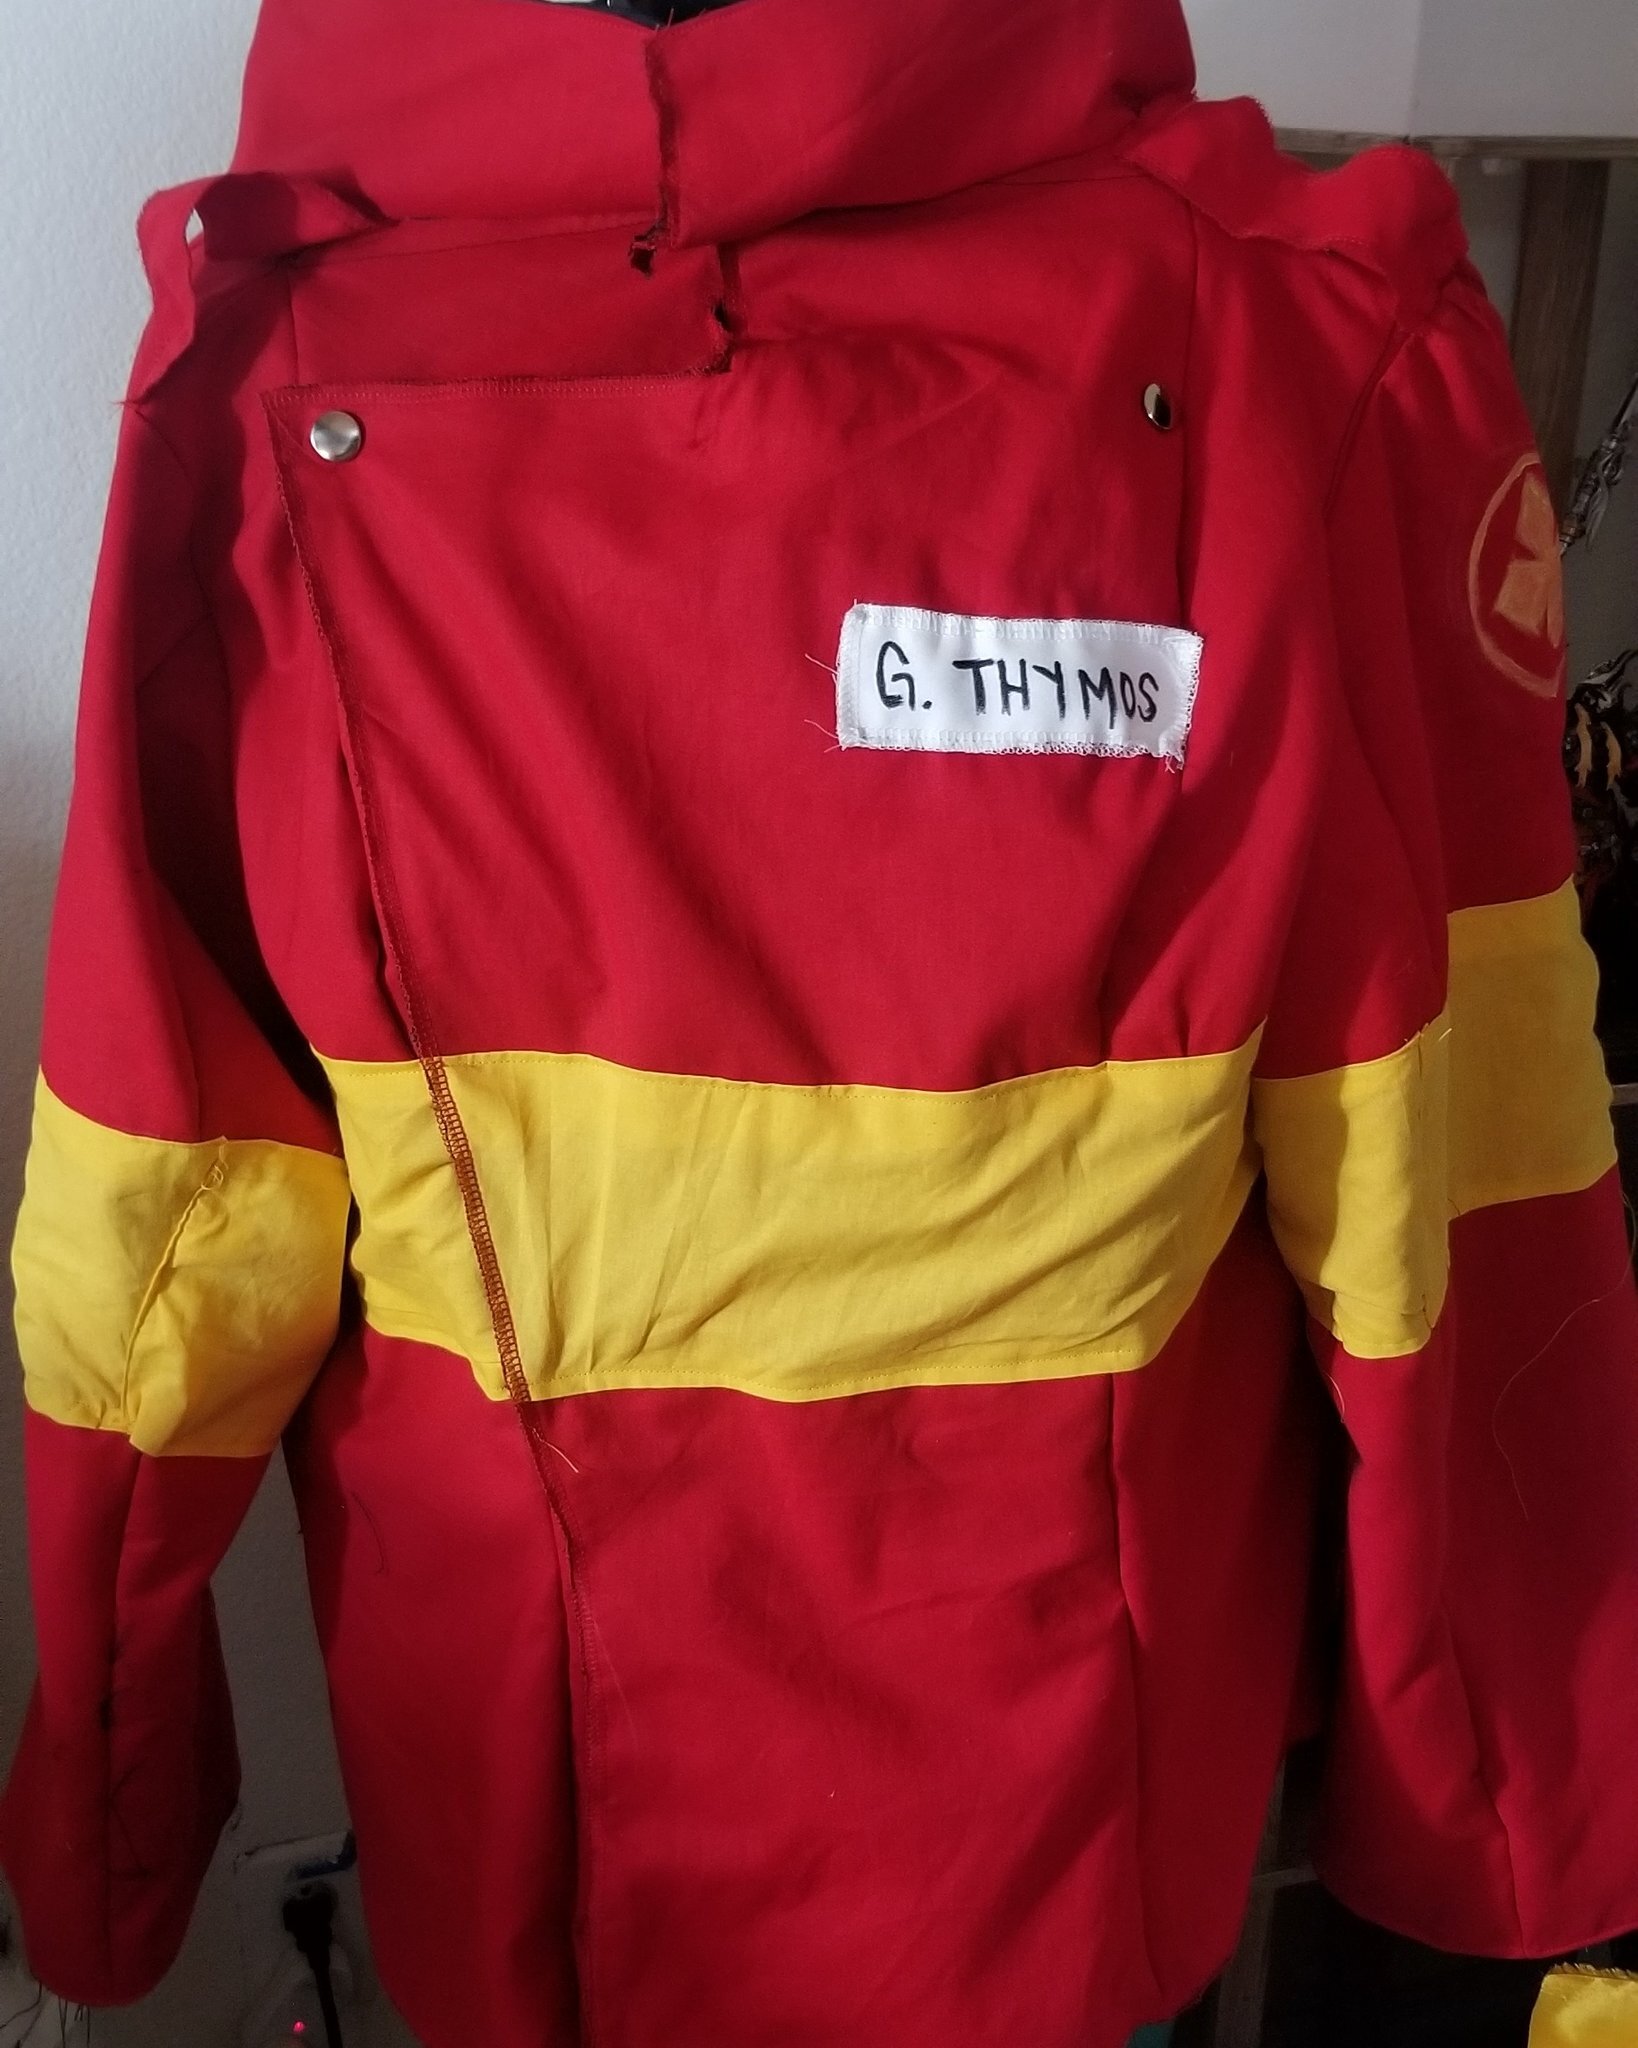
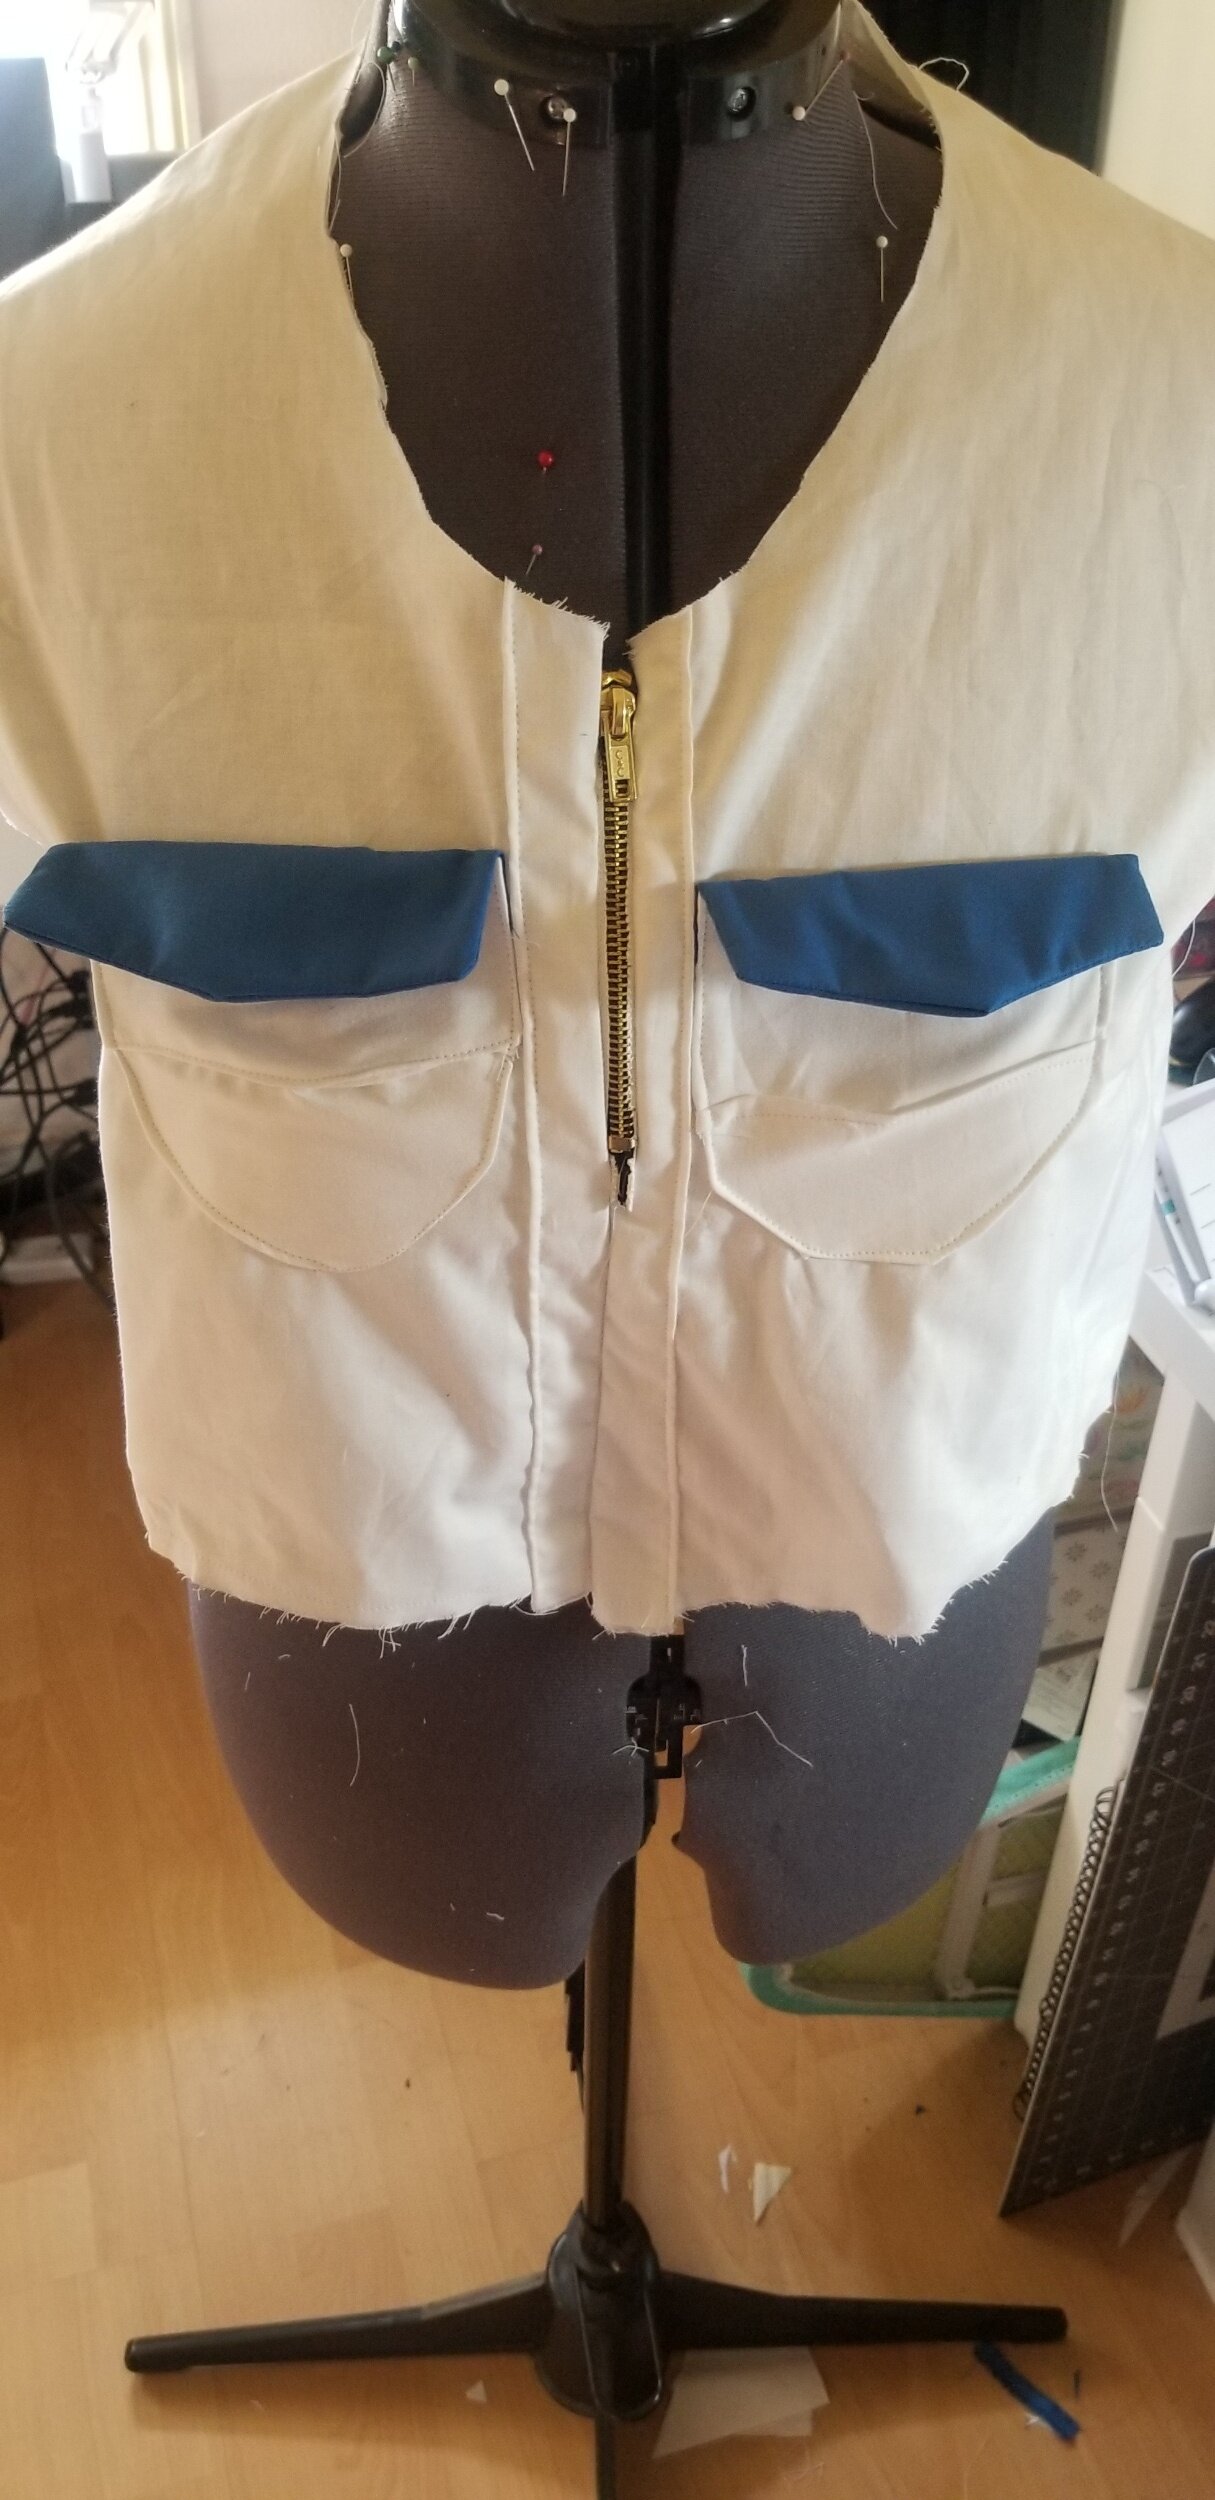
Shirt
I cut out a basic shirt shape with a yoke on the back for that more “school uniform” kind of look, made the pockets, and added that to the front before attaching the front to the back. The zipper goes only about half way. I wanted to find a white zipper, but black was all I could get.

For the collar, it’s a simple peter pan style, sewing two sides together and flipping that inside out for a clean edge.


I added the gold buttons to the pockets (they’re functional pockets!), the blue layer underneath the white on the sleeves, added that weird bib part of the shirt (not photographed), and finished the bottom half of the shirt.


Shorts
At the time of buying fabrics, I threw in what I could for Chadley’s pants also (for that sweet, free shipping). My issue was that I couldn’t find a pattern match I liked in a material I liked and opted for a pattern I liked in a fabric…. that isn’t great. Flannel shorts sounds like a contradiction. Yet, here we are.
The shorts ended up being cursed or something. I ordered a zipper (just a zipper!) four separate times because it was either canceled or straight up lost! Finally got it on the fifth try, after driving an hour away for a zipper under $5 (why…).
I first used packing paper to trace shorts from my Angus Macdonald cosplay (that in retrospect would have worked for this Chadley cosplay *facepalm*) to use as a pattern.


I matched my seams, added pockets (using a serger), a front zipper and a waist band (using a sewing machine)!


These shorts are a bit bright compared to the character render, but this is the first time I made shorts that had pockets and a front zipper, so whatever!

And that’s it! Making shorts with pockets and a front zipper was way easier than I expected. I’ll revisit to add belt loops at some point, probably (probably not). It’s a simple sewing project that cost me under $200 (mostly due to the bag, wig, and shoes).
Total Cost: ~$187
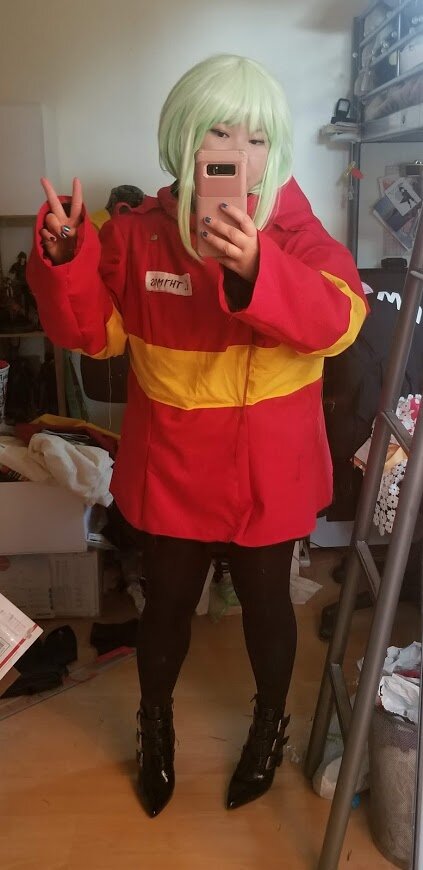
Feeling satisfied enough with it, I took these phone pics using a greenish light, because I felt like that made me look like I was in the Shinra HQ building or something with all the lights from the Mako~


My phone went off as my sock stays fell…